
There's a magic to witnessing the world awaken from a mountaintop, a profound silence broken only by the click of a shutter. Join me as I recount the incredible journeys to peaks where the first light of day didn't just paint the sky, but forever reshaped my perspective on life and photography. ---
Chasing the Dawn: How Mountain Sunrises Forever Changed My Lens and My Life
The air was thin, biting cold, and the darkness absolute. My breath plumed in the frigid predawn, headlamp beam cutting a narrow path across the rough terrain. Every muscle ached from the ascent, and doubt, a sneaky companion, whispered in my ear: Is this really worth it? Then, as if on cue, a faint blush appeared on the horizon, a whisper of orange against the inky black. The world, silent moments before, began to stir. And as the first fiery tendrils of sunlight kissed the highest peaks, painting them in hues so vivid they felt stolen from a dream, I knew. Absolutely, unequivocally, it was worth it. Every single aching step.
That first truly epic mountain sunrise wasn't just a beautiful moment; it was a revelation. It wasn't just a photograph; it was a feeling, a profound connection to the raw, untamed power of nature. It stripped away the mundane, reset my priorities, and ignited a passion that has since guided my travels across continents. As a professional travel blogger for Tripsora, I’ve been fortunate enough to chase countless sunrises, but there’s something uniquely transformative about greeting the dawn from a mountain peak. The struggle, the anticipation, the sheer scale of the beauty – it imprints itself on your soul.
Today, I want to share with you the mountain peaks that didn't just offer incredible photographic opportunities, but genuinely changed my life. These aren't just pretty pictures; they are stories of resilience, awe, and the unparalleled magic of a new day breaking from the roof of the world. Get ready to bookmark, get inspired, and perhaps, start planning your own life-altering ascent.
Bromo's Volcanic Embrace: A Symphony of Smoke and Light (Indonesia)
My journey to Mount Bromo in East Java, Indonesia, felt like stepping onto another planet. The "Sea of Sand" stretched endlessly, a lunar landscape surrounding the active volcano. We started our trek in the dead of night, jeep rattling across the sandy plains, then a short, steep hike up to a viewpoint on Mount Penanjakan.
The cold was intense, but the anticipation was a warm blanket. As the first light crept over the horizon, it revealed a scene I’ll never forget. Below us, the smoking crater of Bromo, flanked by the majestic peaks of Mount Batok and the distant Mount Semeru, stood in stark silhouette. The sky exploded in a palette of oranges, purples, and deep blues, casting an ethereal glow on the swirling volcanic smoke. It felt ancient, primal, and utterly mesmerizing. My camera shutter clicked almost instinctively, trying to capture the impossible depth and texture of the scene.
Why it changed me: Bromo taught me that beauty can thrive amidst raw, untamed power. It was a visceral reminder of Earth's incredible geological forces and our own small place within them. The feeling of breathing in that crisp, volcanic air while watching the world awaken was profoundly humbling.
Practical Tips for Bromo:
- Best Time to Go: Dry season (April to October) offers clearer skies.
- Logistics: Most travelers book an organized jeep tour from Cemoro Lawang or Malang, which includes transport to the viewpoint and then to the base of Bromo for an optional crater hike. Prices typically range from $20-$50 USD per person for the tour.
- What to Bring: Very warm layers (it’s freezing before dawn!), a headlamp, sturdy shoes, and if you’re sensitive to sulfur, a simple face mask for the crater rim.
- Photography Tip: A wide-angle lens (16-35mm) is essential to capture the vastness of the landscape. Don't forget your tripod for long exposures in the low light. Experiment with silhouettes of the mountains against the vibrant sky.
Mesa Arch: The Glowing Gateway to Canyonlands (USA)
Southern Utah's Canyonlands National Park is a landscape photographer's paradise, but Mesa Arch holds a special, almost mythical, status for sunrise. It’s not just a beautiful arch; it’s a portal to a visual phenomenon.
I arrived at the trailhead an hour before sunrise, joining a small procession of fellow photographers, headlamps bobbing in the dark. The hike is short and relatively easy, but finding your spot along the cliff edge requires careful footing. We set up tripods, shoulder-to-shoulder, in respectful silence. As the sun began its ascent, a magic trick unfolded before our eyes. The first rays of light hit the underside of the arch, making it glow with an incandescent, fiery orange hue, reflecting off the vast canyon below. It was like the arch itself was a molten gateway to the abyss.
Why it changed me: Mesa Arch taught me the power of anticipation and the fleeting nature of perfect light. It was a lesson in patience, in sharing a sacred moment with strangers, and in understanding how light can transform an already stunning landscape into something truly otherworldly. The camaraderie among photographers, all quietly focused on the same goal, was also a beautiful takeaway.
Practical Tips for Mesa Arch:
- Best Time to Go: Any time of year, but spring and fall offer pleasant temperatures. Winter can be stunning with snow, but access might be limited.
- Logistics: The arch is located in the Island in the Sky district of Canyonlands National Park, Utah. An entrance fee ($30 per vehicle) applies. Arrive at least 60-90 minutes before sunrise to secure a good spot, especially during peak season.
- What to Bring: Headlamp, warm layers (even in summer, it's cold before dawn), and a sturdy tripod.
- Photography Tip: A wide-angle lens is key. Focus on the arch glowing, and ensure your exposure captures both the bright underside of the arch and the details of the canyon below. Bracketing exposures (taking multiple shots at different exposures) is highly recommended here.
Haleakala's Celestial Canvas: Above the Clouds in Maui (USA)
Imagine standing above a sea of clouds, watching the sun paint the sky with every color imaginable, while the world awakens hundreds of miles below you. That's the experience of a Haleakala sunrise in Maui, Hawaii. It's a phenomenon so popular that you now need a reservation to enter the summit area between 3:00 AM and 7:00 AM.
The drive up the winding road in the dark, through changing climates from tropical to alpine desert, is an adventure in itself. Once at the summit (over 10,000 feet!), the air is thin and piercingly cold. But the moment the sun peeks over the horizon, casting its golden light on the vast volcanic crater and the endless cloud inversion, all discomfort vanishes. It's an almost spiritual experience, a feeling of being on top of the world, suspended between heaven and Earth.
Why it changed me: Haleakala was a profound lesson in perspective. Looking down on clouds, seeing the curvature of the Earth, and witnessing the sheer scale of the sunrise made me feel incredibly small yet connected to something immense. It was a reminder to always look up, to seek out those moments that expand your understanding of the universe.
Practical Tips for Haleakala:
- Best Time to Go: Year-round, but reservations (Haleakala National Park website, $1 per vehicle) are essential and can be booked up to 60 days in advance.
- Logistics: Drive yourself or book a tour. Allow at least 2 hours driving time from most Maui resorts. Park entrance fee ($30 per vehicle) applies in addition to the reservation.
- What to Bring: EXTREMELY warm clothing (hat, gloves, winter coat – it can be below freezing!), snacks, and a full tank of gas.
- Photography Tip: A wide-angle lens is great for the vastness, but a telephoto lens (70-200mm or longer) can capture stunning close-ups of the cloud formations and the sun's dramatic entrance. Don't forget to capture the stars before sunrise!
Tre Cime di Lavaredo: Dolomites' Alpine Majesty (Italy)
The Italian Dolomites are a UNESCO World Heritage site, a jagged, majestic playground of limestone peaks. Tre Cime di Lavaredo, three iconic rock formations, are arguably their most famous inhabitants, and seeing them at sunrise is an experience etched into my memory.
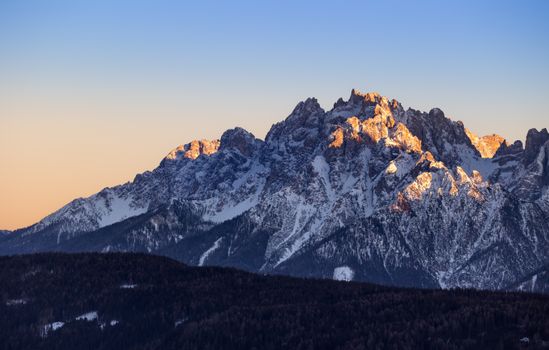
This wasn't an easy sunrise to capture. It required an overnight stay at Rifugio Auronzo, a mountain hut accessible by a toll road. We awoke well before dawn, hiking a short distance to a viewpoint that offered a perfect reflection of the Tre Cime in a small alpine lake. The air was crisp, scented with pine, and the only sounds were our footsteps and the distant murmur of an unseen stream. As the sun climbed, its golden light slowly crept down the towering rock faces, turning the pale grey limestone into a fiery orange, then a soft pink, finally settling into its brilliant white. The reflection in the calm water doubled the magic.
Why it changed me: Tre Cime showed me the sublime beauty of rugged, ancient landscapes and the reward of earning your views. It taught me the value of planning and preparation, and the joy of simple pleasures – a warm coffee in a mountain hut after a breathtaking sunrise. It also solidified my love for alpine environments and the unique light they offer.
Practical Tips for Tre Cime:
- Best Time to Go: Late June to early October, when the rifugios are open and the trails are clear of snow.
- Logistics: Drive to Rifugio Auronzo (toll road, approx. €30 per car). For sunrise, you'll need to stay overnight at Rifugio Auronzo or one of the nearby huts (book well in advance!) or hike in the dark from the parking lot if arriving very early.
- What to Bring: Hiking boots, layers (it gets cold at altitude), headlamp, water, and snacks.
- Photography Tip: A polarizing filter can help reduce glare on the lake and enhance the colors of the sky and mountains. A standard zoom lens (24-70mm) is versatile, allowing you to capture both the wide landscape and tighter compositions of the peaks. Look for interesting foreground elements like wildflowers or rocks.
Chureito Pagoda: Fuji's Iconic Dawn (Japan)
Mount Fuji is a symbol of Japan, and seeing its perfect conical form emerge from the morning mist, framed by the vibrant red Chureito Pagoda and cherry blossoms (if you're lucky!), is a quintessential Japanese experience. This sunrise was less about a challenging hike and more about cultural immersion and iconic composition.
I arrived at Arakurayama Sengen Park in Fujiyoshida City well before dawn, navigating the steep stairs leading to the pagoda. Even in the dark, the energy was palpable – a mix of quiet reverence and eager anticipation. As the sky lightened, Fuji-san slowly revealed itself, majestic and serene. The pagoda, a vibrant splash of red, provided the perfect foreground, and the first golden rays of sun illuminated the scene, creating that instantly recognizable, postcard-perfect image. It felt like stepping into a painting.
Why it changed me: This sunrise taught me the power of iconic imagery and how a specific cultural context can elevate a natural wonder. It was a lesson in composition and the beauty of simplicity. It also reinforced my appreciation for the quiet dignity of Japanese culture and the profound respect they have for nature.
Practical Tips for Chureito Pagoda:
- Best Time to Go: Spring (late March to early April) for cherry blossoms, or autumn (late October to early November) for vibrant fall foliage. Winter offers crisp, clear views but can be very cold.
- Logistics: Take a train to Shimoyoshida Station, then it's about a 10-15 minute walk to the park entrance. Be prepared for a steep climb of around 400 steps to reach the pagoda viewpoint. It's free to enter.
- What to Bring: Comfortable walking shoes, water, and perhaps a hot drink for the wait.
- Photography Tip: A mid-range zoom lens (24-70mm or 70-200mm) is ideal for framing Fuji with the pagoda. Look for leading lines in the stairs or trees. If cherry blossoms are in bloom, incorporate them into your foreground for added visual interest.
Kala Patthar: The Roof of the World's First Light (Nepal)
This isn't just a mountain peak; it's a vantage point. Kala Patthar, a relatively small peak at 5,644 meters (18,519 ft) near Everest Base Camp, offers arguably the most iconic, unobstructed view of Mount Everest at sunrise. It was the culmination of a two-week Everest Base Camp trek, and the ultimate test of my physical and mental endurance.
Starting the hike from Gorak Shep in the dark, at such extreme altitude, was a grueling challenge. Every step was a battle against the thin air and the biting cold. But with each upward glance, the silhouette of Everest grew larger, more formidable. Reaching the summit of Kala Patthar just as the first light touched the "roof of the world" was an emotional explosion. Everest, Lhotse, Nuptse – they ignited in a fiery glow, an almost unbelievable spectacle of nature's grandeur. Tears streamed down my face, partly from the cold, but mostly from the overwhelming sense of accomplishment and awe.
Why it changed me: Kala Patthar was the ultimate life-changer. It taught me the true meaning of perseverance, resilience, and the power of human spirit. It showed me that the greatest rewards come after the greatest struggles. Witnessing Everest bathed in the first light of dawn was a moment of profound spiritual connection, a reminder that there are still places on Earth that can make you feel utterly insignificant yet incredibly alive.
Practical Tips for Kala Patthar:
- Best Time to Go: Spring (March-May) and Autumn (September-November) offer the most stable weather.
- Logistics: This requires undertaking the full Everest Base Camp trek (12-14 days). You'll need permits (TIMS card and Sagarmatha National Park entry), and it's highly recommended to go with an experienced guide and porter. Expect costs for the trek (including guide, porter, food, accommodation, flights to Lukla) to be around $1500-$3000+ USD.
- What to Bring: Extreme cold weather gear (down jacket, thermal layers, hat, gloves, gaiters), sturdy trekking boots, headlamp, water purification tablets, and a very good quality camera with extra batteries (cold drains them quickly).
- Photography Tip: A telephoto lens (70-200mm or longer) is crucial for capturing the details of Everest and the surrounding peaks. Use a sturdy tripod to minimize camera shake in the windy conditions. Be mindful of your breath and hands – they will get cold quickly.
Essential Gear for Your Sunrise Photography Expedition
Beyond the specific tips for each location, here’s a universal gear list that has become my trusted companion on countless dawn missions:
- Camera Body: A reliable DSLR or mirrorless camera with good low-light performance.
- Lenses: A versatile kit including a wide-angle (e.g., 16-35mm) for sweeping landscapes and a telephoto (e.g., 70-200mm or 100-400mm) for compressing distant peaks and capturing details.
- Sturdy Tripod: Non-negotiable for sharp, low-light shots and long exposures.
- Remote Shutter Release: Prevents camera shake.
- Headlamp: With fresh batteries! Essential for navigating in the dark.
- Extra Batteries: Cold temperatures drain batteries fast. Keep spares warm in an inside pocket.
- Power Bank: For charging your phone or other devices.
- Filters: Graduated Neutral Density (GND) filters help balance bright skies with darker foregrounds. A polarizing filter can enhance colors and reduce glare.
- Warm Layers: Dress in layers you can add or remove. Think thermals, fleece, and a waterproof/windproof outer shell.
- Warm Hat & Gloves: Crucial for comfort and dexterity.
- Sturdy, Waterproof Hiking Boots: With good ankle support.
- Water & Snacks: Hydration and energy are key.
- Small Backpack: To carry all your gear comfortably.
Mastering the Art of Mountain Sunrise Photography
It's not just about showing up; it's about preparation and intention.
- Scout Your Location: If possible, visit the spot the day before to identify compositions, foreground elements, and potential hazards. Use apps like PhotoPills or PlanIt Pro to predict sun paths.
- Check the Weather Religiously: Cloud cover, fog, and precipitation can make or break a sunrise shot. Safety first!
- Arrive Early (Very Early!): Give yourself ample time to hike, set up your gear, and compose your shot without rushing. You want to be ready for the "blue hour" before sunrise, which often offers incredible light.
- Composition is King: Look for leading lines, rule of thirds, natural frames, and interesting foregrounds. Don't just point and shoot; think about the story you want to tell.
- Expose for the Highlights: The sky will be the brightest part. Expose for that, and you can recover details in the shadows later in editing. Consider exposure bracketing.
- Patience and Persistence: The best light lasts only moments. Be ready. And if you don't get it right the first time, there's always tomorrow.
- Mindset Matters: While getting the shot is important, remember to put your camera down for a few moments and simply experience the sunrise. Breathe it in. Feel the cold air, listen to the silence. Those are the moments that truly change you.
Your Dawn Awaits: Beyond the Lens
These mountain sunrises weren't just about the photographs I brought home. They were about the journey, the challenge, the quiet contemplation, and the profound sense of connection to something larger than myself. They taught me resilience, patience, and the incredible beauty that emerges from overcoming discomfort. They reminded me to seek out moments of awe, to push my boundaries, and to always, always chase the light.
Every mountain peak offers a unique perspective, a different story to tell, and a fresh opportunity for self-discovery. Whether you’re a seasoned photographer or just starting out, I urge you to experience the magic of a mountain sunrise. It won't just fill your memory cards; it will fill your soul.
Which peak will you conquer next? Which sunrise will ignite your spirit? Start planning your adventure today, pack your bags, and prepare for a life-changing encounter with the dawn. Trust me, the view from the top is always worth it.
---
More pictures


Tags
Share this guide
We may earn a commission if you click a link and buy a product or service, at no extra cost to you. How affiliate links work.
Been there?