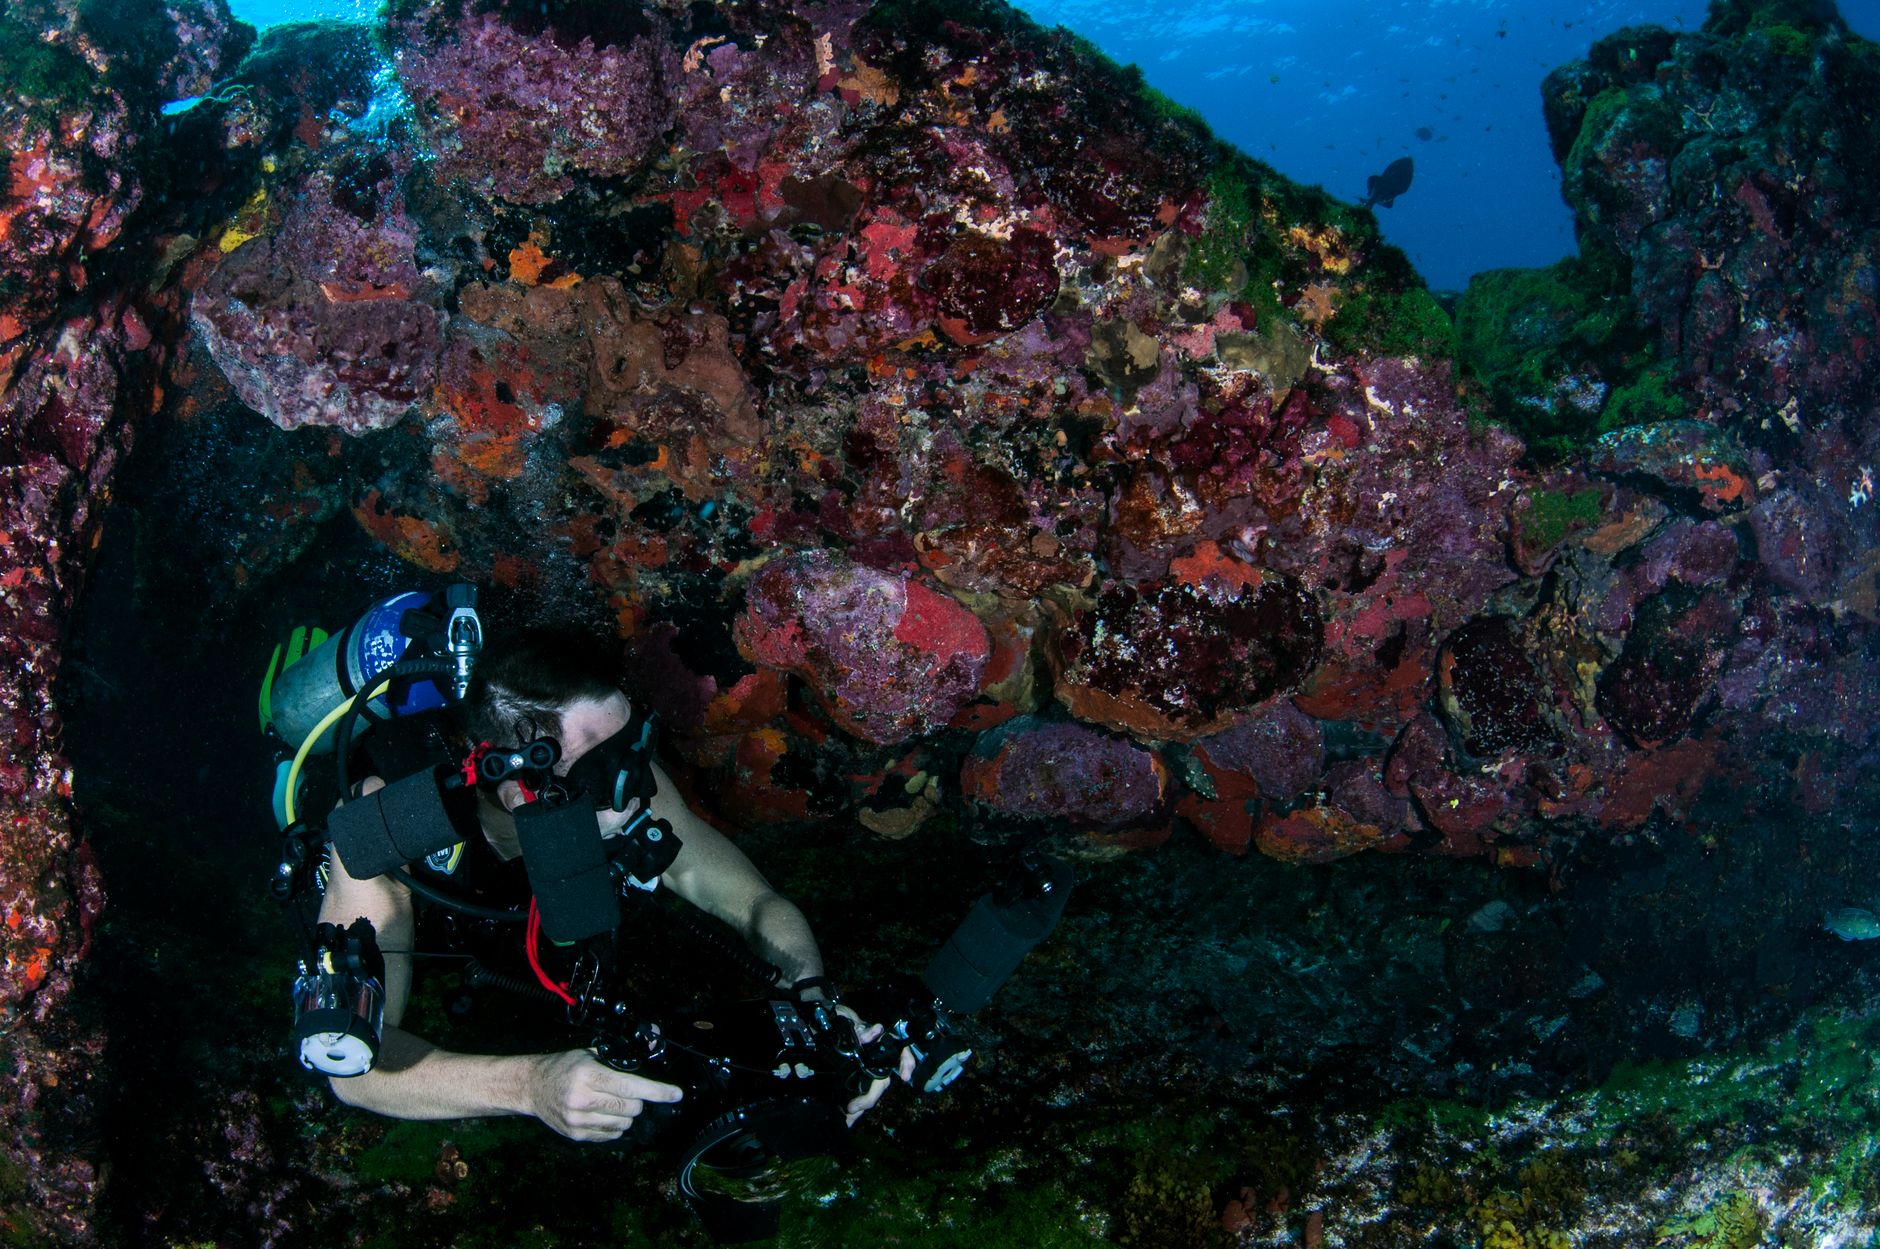
Ever dreamt of capturing the breathtaking beauty of the ocean's hidden world? This guide reveals the must-have underwater photography gear for beginners, along with expert tips and dream destinations, ensuring you don't just see but truly *experience* and capture the magic before it's too late. Get ready to dive into a new passion! ---
Dive In! Beginner Underwater Camera Gear You NEED Before You Die
The first time I saw a sea turtle glide effortlessly past me, its ancient eyes meeting mine for just a fleeting second, my heart skipped a beat. We were off the coast of Gili Trawangan, Indonesia, on a casual snorkel trip, and the world beneath the surface was an explosion of color and life I’d only ever seen in documentaries. My phone, safely tucked away in a dry bag on the boat, felt miles away, and I was left with just the memory. A profound, beautiful memory, yes, but one I desperately wished I could have shared, replayed, and cherished forever.
That moment ignited a spark. A burning desire to not just witness the underwater world but to capture it. To bring those fleeting encounters, those vibrant coral gardens, and the silent ballet of marine life back to the surface with me. If you’ve ever felt that same pull, that yearning to immortalize the magic beneath the waves, then you’re in the right place. Trust me, experiencing and capturing this world is something you need to do before you die. And guess what? You don't need to be a pro diver or spend a fortune to start.
This isn't just about snapping a photo; it's about connecting with a different realm, preserving precious moments, and sharing the wonder. As your resident Tripsora travel blogger, I’ve navigated the murky waters (pun intended!) of beginner underwater photography, made mistakes, learned lessons, and ultimately, captured some of the most incredible moments of my life. I’m here to guide you through the essential gear, the crucial skills, and the dream destinations to kickstart your own underwater photography journey. Let's dive in!
Why Underwater Photography? More Than Just a Photo.
Before we even talk about gear, let's talk about why. Why dedicate yourself to this unique niche of photography? For me, it’s multifaceted.
Firstly, it’s an entirely different world. The light behaves differently, colors shift, and the inhabitants move with an alien grace. Capturing this perspective offers a unique challenge and immense satisfaction. Imagine showing your friends a photo of a clownfish peeking out from its anemone, not from a screen, but from your camera, your experience.
Secondly, it’s a powerful tool for conservation. The more people see the beauty and fragility of our oceans, the more likely they are to care and act. My photos from the vibrant reefs of Raja Ampat or the delicate corals of the Philippines often spark conversations about marine protection, plastic pollution, and sustainable travel. It transforms a simple image into a call to action.
Thirdly, it’s incredibly meditative. When you’re focused on buoyancy, composition, and waiting for that perfect shot, the rest of the world fades away. It’s just you, your camera, and the silent, breathtaking ballet of the ocean. My most peaceful moments often happen 10 meters deep, camera in hand, completely immersed. It's a connection to nature that few other hobbies offer.
So, yes, it's more than just a photo. It's an experience, a mission, and a form of therapy.
The Absolute Essentials: Your First Dip into the Deep End (Gear List)
When I first started, the sheer amount of gear available felt overwhelming. Strobes, enormous housings, complex cameras – it all seemed out of reach. But fear not! For beginners, the path is surprisingly straightforward and budget-friendly. Here’s what you absolutely need to get started:
1. The Action Camera: Your Rugged Gateway to the Deep
Forget expensive DSLRs for now. Your best friend for starting out is a good action camera. Why? They are compact, incredibly rugged, generally waterproof to a decent depth on their own, and offer excellent video capabilities alongside stills.
- My Pick: The GoPro Hero 11 Black or DJI Osmo Action 3.
- GoPro Hero 11 Black: (~$350-400) This has been my go-to for years. It's user-friendly, has incredible image stabilization, and captures stunning 5.3K video and 27MP stills. The wide-angle lens is perfect for capturing expansive reef scenes.
- DJI Osmo Action 3: (~$300-350) A fantastic competitor, often praised for its excellent battery life and unique quick-release mounting system. Its color science is also very pleasing straight out of the camera.
- Pro Tip: For stills, set your action camera to burst mode (e.g., 10 photos in 1 second) or time-lapse photo mode (e.g., 0.5-second intervals). This increases your chances of getting that perfect shot of a fish swimming by. For video, shoot in a flat color profile (like GoPro's "Flat" or DJI's "D-Log M") if you plan to edit, as it retains more detail for post-production. Set your frame rate to at least 60fps for smoother footage, especially if you want to slow it down later.
2. Dedicated Waterproof Housing: Extra Depth, Extra Protection
While most action cameras are waterproof to 10-15 meters on their own, a dedicated waterproof housing is a non-negotiable accessory for anything beyond snorkeling or shallow dives.
- Why you need it:
- Increased Depth Rating: Most housings extend your camera’s depth limit to 40-60 meters (130-200 feet), covering almost all recreational diving.
- Enhanced Protection: It adds an extra layer of defense against bumps, scratches, and pressure.
- Mounting Options: Housings often have standard GoPro mounts, allowing you to attach them to various accessories.
- My Pick: Always go for the official brand housing (e.g., GoPro's Protective Housing) first. They are designed perfectly for your camera. Third-party options like Telesin also offer reliable housings at a slightly lower price point.
- Prices: ~$50-80.
- Pro Tip: ALWAYS check the O-ring seal before every use. A single grain of sand or a hair can compromise the seal. Lubricate it occasionally with silicone grease. And for the love of all things marine, use anti-fog inserts! They are tiny silica gel packets that prevent condensation inside the housing, saving your shots from blurry haze. A pack of 12 costs about $10.
3. Red/Magenta Filter: Bringing Back the Color
This is arguably the most crucial accessory for vibrant underwater photos, especially for action cameras. As you descend, water absorbs different colors of light at varying rates. Red is the first to disappear, followed by orange and yellow. This is why everything looks blue or green underwater.
- What it does: A red filter (for blue water, like oceans) or a magenta filter (for green water, like lakes or some rivers) compensates for this color loss by adding red/magenta back into the spectrum, helping your camera capture more natural and vibrant colors.
- My Pick: PolarPro DiveMaster 3-Pack (~$70-100) for GoPro includes red, magenta, and snorkel filters. For DJI, specific filters are also readily available.
- Pro Tip: Filters are depth-dependent. A shallow-water filter might be too strong at 20 meters, and vice-versa. Many filters are designed for specific depth ranges (e.g., 5-20m, 20m+). If you're frequently changing depths, consider a flip filter system that allows you to easily switch or remove filters underwater. If you only get one, aim for a mid-depth range (5-20m) as that's where most beginners will spend their time.
4. Floating Hand Grip/Pole: Don't Lose Your Precious!
This seems basic, but it’s a lifesaver (literally, for your camera).
- Why you need it:
- Security: If you accidentally drop your camera, a floating grip ensures it bobs to the surface instead of sinking to the abyss.
- Stability: It gives you a more stable hold than just holding the camera, reducing shaky footage.
- Reach: A short pole allows you to get closer to subjects without disturbing them (within respectful limits!) or to take a better selfie.
- My Pick: Any sturdy, brightly colored floating hand grip from brands like Ulanzi, Telesin, or GoPro's own "The Handler."
- Prices: ~$15-30.
- Pro Tip: Always attach the wrist lanyard! Even with a floating grip, currents can be strong, and you don't want to lose your grip.
Stepping Up Your Game: Beyond the Basics (Optional but Recommended)
Once you've mastered the action camera and feel confident, you might yearn for more control, better image quality, or macro capabilities. This is where compact cameras come in.
1. Compact Camera + Housing: The Next Evolution
A dedicated waterproof compact camera, paired with its own housing, is a significant leap in image quality and creative control.
- My Pick: The Olympus Tough TG-6 (~$450-500) is the undisputed king for beginner-to-intermediate underwater photographers.
- Why it's great: It's waterproof to 15m on its own, incredibly rugged, has excellent macro capabilities (perfect for tiny nudibranchs!), and can shoot in RAW format for maximum editing flexibility. Its dedicated underwater modes are fantastic.
- Housing: Pair it with the Olympus PT-059 Housing (~$300-400). This housing extends its depth rating to 45m and provides access to all camera controls.
- Pro Tip: Learn to shoot in Aperture Priority (A) mode or Manual (M) mode on the TG-6. This gives you control over depth of field and exposure. Experiment with the camera's built-in Underwater White Balance settings – they are surprisingly good and can reduce your reliance on filters in certain conditions.
2. Underwater Strobe/Video Light: Illuminate the Depths
While filters help with color, they don't add light. Underwater lights are game-changers, especially as you go deeper or shoot in darker conditions.
- Strobes: Provide a burst of flash, much like an external flash on a DSLR. They restore vibrant colors and freeze motion.
- Video Lights: Provide continuous light, perfect for video and for focusing your camera in low light. Many modern video lights are powerful enough to be used for stills too.
- My Pick:
- SeaLife Sea Dragon Mini 2000F Dive Light (~$250-300): A powerful, compact video light that can also be used as a focus light.
- Weefine Smart Focus 2500 (~$300-400): Another excellent option, offering both flood and spot beams.
- Pro Tip: Positioning your light is key to avoiding backscatter (those annoying white dots that look like snow). Angle your light source away from your camera lens, illuminating the subject from the side or slightly above/below. This technique is called "external lighting" or "raking light."
3. Tray and Arms: Stability and Flexibility
Once you add lights, you'll need a way to hold everything. A tray and arm system provides a stable platform and allows you to position your lights precisely.
- My Pick: Brands like Fantasea, Sea & Sea, or I-Torch offer excellent modular systems. Start with a basic tray and a single arm for one light, then expand as needed.
- Prices: ~$100-300 for a basic tray and arm.
- Pro Tip: Invest in buoyancy arms if you plan on adding heavier lights. These arms have air pockets that help offset the weight of your gear underwater, making your rig more neutrally buoyant and easier to handle.
Essential Skills & Mindset: More Important Than Gear
You can have the most expensive gear in the world, but without fundamental skills and the right mindset, your photos will fall flat.
1. Buoyancy Control: The Golden Rule
This cannot be stressed enough. Excellent buoyancy control is paramount for underwater photography.
- Why:
- Stability: A stable photographer takes stable, sharp photos. You can hover motionless, waiting for the perfect moment.
- Reef Protection: You won't accidentally kick or bump delicate corals or marine life. This is ethical and essential.
- Efficiency: Less finning means less disturbance and less kicking up sediment, which can ruin visibility.
- Actionable Advice: Practice, practice, practice! Take a PADI Peak Performance Buoyancy specialty course. It's one of the best investments you can make. Spend time in the water just hovering, controlling your depth with your breath, and refining your trim.
2. Respect for Marine Life: Observe, Don't Disturb
This is non-negotiable. The ocean is not a petting zoo or a photo studio.
- The Rule: Look, but don't touch. Never chase, harass, or feed marine animals. Maintain a respectful distance.
- Personal Anecdote: I once witnessed a diver trying to "herd" a turtle for a selfie. Not only was it stressful for the animal, but the resulting photo was terrible because the turtle was clearly agitated. A truly beautiful photo comes from observing an animal in its natural, undisturbed state.
- Actionable Advice: Learn about the marine life you might encounter. Understand their behavior. Patience is key; often, if you remain still and calm, curious creatures will approach you.
3. Composition Basics: Framing Your Shot
Even underwater, the rules of good composition apply.
- Rule of Thirds: Imagine a tic-tac-toe grid over your viewfinder. Place your subject at the intersections or along the lines for a more dynamic shot.
- Leading Lines: Use coral formations or schools of fish to draw the viewer's eye towards your main subject.
- Negative Space: Sometimes, less is more. An isolated subject against a vast blue background can be incredibly powerful.
- Get Close, Get Low: Water absorbs light and clarity quickly. The closer you are to your subject, the better your colors and sharpness will be. Try to get eye-level with your subject.
4. Patience: The Photographer's Virtue
Underwater, things move at their own pace. You might wait minutes, or even an entire dive, for that perfect shot.
- Actionable Advice: Don't rush. Observe your subject's behavior. Anticipate their movements. Sometimes, the best shots happen when you least expect them, simply because you were patient enough to be there.
5. Safety First: Always Dive Within Your Limits
Underwater photography should enhance your dive experience, not detract from your safety.
- Actionable Advice: Always dive with a buddy. Monitor your air and no-decompression limits. Don't get so engrossed in your camera that you forget about your surroundings or your dive plan. If you're struggling with buoyancy or getting the shot, put the camera down and focus on your safety.
My Top 3 Beginner-Friendly Underwater Photography Destinations
Having the right gear is one thing, but having incredible subjects makes all the difference. Here are three destinations perfect for beginner underwater photographers, offering stunning marine life and relatively easy conditions.
1. El Nido & Coron, Palawan, Philippines
- Why it's great: The Philippines is a global hotspot for marine biodiversity, and Palawan is its crown jewel. El Nido offers breathtaking limestone karst landscapes above water and stunning shallow reefs below. Coron, while famous for its WWII shipwrecks (more for advanced divers), also boasts pristine coral gardens and tranquil lakes perfect for snorkeling and shallow dives.
- What you'll see: Colorful hard and soft corals, clownfish, angelfish, barracudas, reef sharks (occasionally), and an abundance of sea turtles. The visibility is usually excellent.
- Experience: My first decent underwater photos of a clownfish in its anemone were taken in El Nido's Miniloc Island. The shallow, clear waters made it incredibly easy to practice composition and lighting with just my GoPro and a red filter. Island hopping tours (around $20-50 USD per day) often include multiple snorkel stops.
- Pro Tip: Don't miss the Secret Lagoon in El Nido for unique light and shadow play, and Barracuda Lake in Coron for an otherworldly thermocline experience.
2. Koh Lanta, Thailand
- Why it's great: Thailand's Andaman Sea offers calm, warm waters and access to some incredible dive sites. Koh Lanta is a relaxed island base with dive shops catering to all levels. While Hin Daeng and Hin Muang are famous for whale sharks and manta rays (seasonal, and deeper), closer sites like Koh Haa and Koh Bida are perfect for beginners.
- What you'll see: Leopard sharks, schools of barracuda, vibrant anemone fields, nudibranchs, seahorses, and incredible macro life if you look closely.
- Experience: I remember a dive at Koh Haa where I spent an entire safety stop photographing a tiny porcelain crab in an anemone, completely absorbed. The gentle currents and abundant life make it a fantastic learning ground. A 2-dive day trip usually costs around $70-120 USD.
- Pro Tip: If you're feeling adventurous, try a night dive at Koh Lanta. The bioluminescence and nocturnal creatures offer a completely different photographic challenge and reward.
3. Cozumel, Mexico
- Why it's great: Cozumel is famous for its drift diving, but its vibrant reefs are also very accessible for beginners. The currents do most of the work, allowing you to float effortlessly while focusing on your photography. The visibility is often spectacular.
- What you'll see: Giant groupers, moray eels, nurse sharks, majestic eagle rays, and the endemic Cozumel splendid toadfish. The coral formations are stunning, with dramatic swim-throughs and walls.
- Experience: My first drift dive in Cozumel, along the Palancar Reef, felt like flying. With my Olympus TG-6, I managed to capture an incredible shot of an eagle ray gliding past, an experience made easier by the effortless drift. A two-tank dive trip typically costs $80-120 USD.
- Pro Tip: Beyond the ocean, Cozumel is close to the Yucatan Peninsula's cenotes. These freshwater sinkholes offer a unique, ethereal photography experience with incredible light beams filtering through the jungle canopy. You'll need a good video light here!
Post-Production Pointers (Quick & Easy)
You've got the shots! Now what? A little post-processing can make a huge difference.
- Mobile Apps: For quick edits on the go, Lightroom Mobile (free version) or Snapseed are fantastic.
- Key Adjustments:
- White Balance/Color Correction: This is where you fine-tune the colors, especially if you didn't use a filter or if the filter wasn't perfect.
- Exposure: Brighten shadows, recover highlights.
- Contrast: Add a little punch to your images.
- Sharpness: Enhance details.
- Cropping: Improve composition.
- Why RAW (if applicable): If you're using a camera like the Olympus TG-6, shoot in RAW. RAW files contain much more image data than JPEGs, giving you far greater flexibility in editing, especially for correcting white balance and recovering details.
- Avoid Over-Editing: The goal is to make your photos look natural and vibrant, not artificial. Less is often more.
Before You Die, Dive In!
The underwater world is a treasure trove of beauty, wonder, and profound experiences. Learning to capture it with a camera is not just a skill; it's a way to deepen your connection with nature, share its magic, and create memories that truly last a lifetime. From the simplest GoPro setup to a more advanced compact camera, the barrier to entry for beginner underwater photography has never been lower.
So, what are you waiting for? Grab your gear, book that trip, and dive in! The ocean is calling, and it's ready for its close-up.
Share your first incredible shots with us using #TripsoraUnderwater! What's the most amazing thing you've ever seen underwater that you wished you could have photographed? Let us know in the comments below!
---
More pictures


Tags
Share this guide
We may earn a commission if you click a link and buy a product or service, at no extra cost to you. How affiliate links work.
Been there?