
Ever struggled to capture the magic of a dimly lit cafe or a vibrant museum interior? This guide reveals game-changing lighting tricks that will elevate your indoor travel photos from forgettable to absolutely breathtaking, all without expensive gear. Get ready to blow your mind and your Instagram feed!
Lighting Tricks for Stunning Indoor Shots That Will Blow Your Mind!
The rain was pouring down, a typical grey Parisian afternoon, and I was huddled inside a charming little cafe in Le Marais. The aroma of freshly baked croissants filled the air, and the clinking of coffee cups created a symphony of coziness. It was the moment – that perfect, quintessential Parisian experience I wanted to capture. My camera was ready, phone in hand, and I aimed at my perfectly frothed cappuccino, strategically placed next to a vintage postcard. Click.
Then I looked at the photo.
Sigh.
It was… dull. Grainy. The beautiful warm light from the cafe’s antique lamps had turned into an ugly orange cast, and the window light was just a blown-out white blob. It looked nothing like the vibrant, inviting scene I was experiencing. My heart sank. How many times had this happened? Countless. Beautiful moments, ruined by bad indoor lighting.
For years, I believed stunning indoor travel photos were reserved for professional photographers with fancy, expensive gear. But after countless blurry museum shots and dull restaurant snaps, I decided enough was enough. I started experimenting, researching, and making a lot of mistakes. And what I discovered completely transformed my photography, turning those once-frustrating indoor scenes into some of my most cherished and shareable images.
And the best part? You don't need a hefty budget or a photography degree. Just a keen eye, a few simple tricks, and a willingness to play. Get ready, fellow travelers, because these lighting secrets are about to blow your mind and revolutionize your indoor shots!
---
1. The Power of the Window: Mastering Natural Light Indoors
Forget the "golden hour" for outdoor shots; indoors, the window is your golden ticket. Natural light is almost always the most flattering, and knowing how to harness it is your first, most crucial step.
I remember being in a gorgeous Airbnb in Lisbon, the kind with those iconic tiled walls and a tiny balcony overlooking the city. The light from the large windows was just glowing in the late afternoon. Instead of taking a photo of the entire room, which would have been underexposed in some areas and overexposed in others, I focused on a corner near the window. I placed a book, a cup of tea, and my travel journal on a small table, letting the soft, diffused light fall gently on them. The result? A perfectly lit, atmospheric flat lay that screamed "cozy Lisbon morning."
Your Actionable Tips:
- Find Your Light Source: Always identify the dominant natural light source – usually a window or an open doorway. Position your subject (or yourself, for a selfie!) so the light hits it from the side or slightly in front. Avoid having the window directly behind your subject unless you're intentionally going for a silhouette.
- Diffuse, Don't Direct: Direct sunlight streaming through a window can be harsh, creating strong shadows and blown-out highlights. Look for windows with sheer curtains, or use a thin white scarf or even tracing paper to diffuse the light. This creates a softer, more even illumination.
- Reflect and Redirect: A simple white wall, a white tablecloth, or even a piece of white paper can act as a reflector. Position it opposite your main light source to bounce light back onto your subject, filling in shadows and adding brightness. I’ve used a restaurant napkin to illuminate a dish more times than I can count!
- Embrace the Shadows (Sometimes): Don't be afraid of shadows! When used creatively, they can add depth, drama, and mood to your photos. Look for interesting patterns created by window frames or objects.
---
2. Beyond the Flash: Harnessing Artificial Light Like a Pro
Indoor spaces, especially historic buildings, bustling markets, or intimate restaurants, often rely on artificial light. And let's be honest, your phone's built-in flash is usually a recipe for disaster – harsh, flat, and unflattering. But that doesn't mean you're out of luck!
One of my favorite memories is from a street food tour in Marrakech. We were in a dimly lit, bustling stall, and the steam from the tagines created a magical haze. My phone flash would have ruined the atmosphere. Instead, I noticed a small, ornate lamp hanging above our table. I positioned my camera to use that lamp as my key light, letting its warm glow illuminate the vibrant colors of our meal. I even asked my friend to hold her phone flashlight, bounced off a white wall behind the dish, to add a subtle fill light. The photo captured the authentic, warm chaos of the moment perfectly.
Your Actionable Tips:
- Identify Existing Lamps: Look for table lamps, pendant lights, or even strategically placed spotlights. These are your new best friends. Use them as your main light source.
- Backlight for Drama: Position your subject between you and a light source (like a stylish lamp or string lights) for a dramatic, glowing effect. This is fantastic for portraits or highlighting objects.
- Bouncing the Phone Flashlight: This is a game-changer! Instead of pointing your phone's flashlight directly at your subject, point it at a nearby white wall, ceiling, or even a white menu. The bounced light will be much softer and more even. It's like having a mini softbox in your pocket!
- Fairy Lights & String Lights: These aren't just for decoration; they're fantastic light sources for creative, moody shots. Drape them, wrap them, or use them as bokeh in the background. They're especially great for cozy cafe or hotel room shots.
- Candlelight Magic: For romantic dinners or atmospheric scenes, candles provide incredibly soft, warm light. Get close to your subject and let the flame illuminate it. Be mindful of your camera's ISO settings to avoid excessive grain.
---
3. The Unsung Heroes: Budget Gear That Makes a HUGE Difference
You don't need a professional lighting kit. Seriously. Some of the most effective tools are incredibly cheap, lightweight, and can fit in your backpack.
During a trip to Kyoto, I stayed in a beautiful traditional ryokan. The light was very dim, perfect for relaxation, but terrible for photos. I wanted to capture the intricate details of the tea ceremony setup. My window light was too weak. I remembered a small, foldable reflector I'd bought online for about $15. I propped it up on the floor, angled it towards the small lamp in the corner, and bounced the light onto the tea set. Voila! Instant, soft illumination that highlighted every delicate brushstroke on the pottery.
Your Actionable Tips:
- Foldable Reflector/Diffuser (around $15-$30): This is the MVP. One side is silver (for reflecting brighter, cooler light), one gold (for warmer light), and the middle is a translucent diffuser. It folds down to nothing and is incredibly versatile.
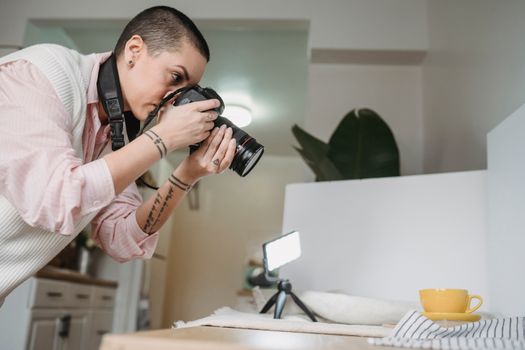
- Small LED Panel (around $20-$50): These tiny, battery-powered lights are fantastic. Many have adjustable brightness and color temperature. They're perfect for illuminating food, small objects, or adding a catchlight to portraits in dim conditions. Look for brands like Ulanzi or Neewer on Amazon.
- White Cardboard/Foam Board (Free-$5): Seriously, a simple piece of white cardstock or foam board can be an amazing reflector. Keep one flat in your luggage or grab one from a local stationery store.
- A Small Torch/Flashlight (Free-on your phone): Beyond bouncing, a powerful flashlight can be used for light painting or adding a focused beam of light to specific areas.
- Thin White Fabric/Tracing Paper: Great for diffusing harsh light from a lamp or window. A simple white handkerchief or scarf can do wonders.
---
4. Composition is King: How Light Guides the Eye
Lighting isn't just about brightness; it's about shaping your image, creating mood, and guiding the viewer's eye. Good lighting makes your composition sing.
I was exploring the Uffizi Gallery in Florence, mesmerized by the Renaissance masterpieces. The sheer scale and detail were overwhelming. I wanted to capture a sense of the grandeur, but also the intimacy of a single work. I noticed a spotlight perfectly illuminating a specific statue, casting dramatic shadows on the wall behind it. Instead of trying to capture the whole room, I focused on that statue, letting the light draw my eye to its exquisite details, and the surrounding darkness emphasize its prominence. It created a powerful, artistic shot that felt like a painting itself.
Your Actionable Tips:
- Leading Lines of Light: Look for how light creates lines or pathways in your scene. A beam of light streaming through a window, or a row of lamps, can lead the viewer's eye directly to your subject.
- Frame with Light and Shadow: Use areas of light and shadow to frame your subject. A brightly lit object surrounded by darker areas immediately draws attention.
- Create Depth with Light: Varying levels of light and shadow create a sense of three-dimensionality. Brighter foregrounds and darker backgrounds (or vice-versa) add depth.
- Silhouettes & Mystery: When the light source is directly behind your subject, embrace the silhouette! It creates drama, mystery, and focuses on shape and form rather than detail. Perfect for capturing people against a beautiful window.
- Highlight the Hero: Use your best light to illuminate the most important element in your photo. If it's a dish, make sure the light makes it look appetizing. If it's a person, make sure their face is well-lit.
---
5. Post-Processing Power-Up: Enhancing Your Light
Even with the best on-location lighting tricks, post-processing is where you truly refine and enhance your images. It’s like turning up the volume on your lighting masterpiece. And again, you don’t need expensive software – your phone has powerful tools!
After a long day exploring the colorful streets of Lisbon, I had taken a photo inside a small, traditional Fado house. The atmosphere was incredible, but the photo was a bit dark and flat. Later, back at my Airbnb, I opened the photo in Lightroom Mobile (a free app!). I gently boosted the shadows, pulled back the highlights a touch to reveal detail in the lamps, and adjusted the white balance to bring out the warmth of the wood. I also used a radial filter to subtly brighten the singer's face. The difference was astonishing – the photo went from "okay" to "wow, I need to be there!"
Your Actionable Tips (using apps like Lightroom Mobile, Snapseed, VSCO):
- Adjust Exposure & Contrast: Your first step. Brighten underexposed areas and add contrast to make your image pop. Be careful not to overexpose (blow out) highlights.
- Highlights & Shadows: These are your best friends for tricky indoor light. Reduce highlights to bring back detail in bright areas (like windows) and boost shadows to reveal detail in darker areas without making the whole image too bright.
- Whites & Blacks: Fine-tune the brightest and darkest points in your image for more punch.
- White Balance: Indoor artificial light often casts a warm (orange/yellow) or cool (blue/green) tint. Adjust the white balance to make whites appear truly white, or intentionally warm/cool the image for mood.
- Clarity & Dehaze: These sliders can add crispness and remove any atmospheric haze, making your subjects stand out more. Use sparingly.
- Selective Adjustments: Use brushes or radial/linear filters (available in most apps) to brighten specific areas (like a face or a dish) or darken others (like a distracting background) without affecting the whole image.
- Noise Reduction: Indoor photos, especially in low light, can be grainy. Many apps have a noise reduction slider. Use it gently to smooth out grain without losing too much detail.
---
6. Advanced (But Easy!) Tricks for Specific Indoor Scenarios
Let's get specific. Different indoor environments call for slightly different approaches.
- Food Photography in Restaurants: Always, always try to sit near a window or a well-lit wall. If not, use a lamp as a side light. Hold your phone flashlight (bounced off a menu or napkin) to fill in shadows. Angle your plate slightly so the light catches the textures. I once used a small LED panel (the $30 kind) to light up a stunning sushi platter in a dimly lit restaurant in Tokyo – the waiter was intrigued!
- Museums & Galleries: These are often challenging due to low light and "no flash" rules. Increase your ISO (which might add grain, but better than blurry!) and use a wide aperture if your camera allows. Focus on spotlights illuminating specific artworks. Look for interesting perspectives that use the existing light to highlight architectural details or create dramatic shadows.
- Cozy Cafes & Bars: Embrace the mood! Use the warm glow of lamps, string lights, and candles. Don't try to make it bright; instead, capture the soft, inviting ambiance. Focus on details – latte art, a stack of books, a hand holding a warm mug.
- Hotel Rooms & Airbnbs: Look for the best window light for flat lays or portraits. Use bedside lamps or desk lamps to create a cozy, inviting glow. Use your reflector to bounce light into darker corners. I often use my small LED panel to illuminate my travel essentials for an Instagram-worthy flat lay on a hotel bed.
- Market Interiors: These are often chaotic but vibrant. Look for shafts of light cutting through the stalls, highlighting colorful spices or textiles. Use the existing overhead lights to your advantage, and don't be afraid to get close to capture the details.
---
Ready to Light Up Your Feed?
Indoor photography used to be my Achilles' heel, a source of endless frustration. But armed with these simple, actionable lighting tricks, it’s become one of my favorite challenges. From the soft glow of a Venetian cafe to the dramatic shadows of a historic temple in Thailand, I now feel confident I can capture the true essence of any indoor travel experience.
You don't need to spend a fortune on equipment. Your phone, a keen eye, and these techniques are powerful enough to transform your photos from dull to dazzling. So, next time you're tucked away in a beautiful indoor space, don't just point and shoot. Take a moment to observe the light. Experiment. Play. And watch as your indoor shots start to blow your mind – and everyone else's!
Now it's your turn! Try these tricks on your next adventure, or even in your own home. Capture those stunning indoor moments and share them with the world. I can't wait to see what magic you create!
What are your favorite indoor lighting hacks? Share your tips and triumphs in the comments below!
---
More pictures

Tags
Share this guide
We may earn a commission if you click a link and buy a product or service, at no extra cost to you. How affiliate links work.
Been there?