
My journey from blurry, unappetizing food photos to professional-grade shots wasn't just about improving my camera skills – it completely transformed my travel blog and my entire approach to experiencing the world. Get ready to discover the secrets that changed my life forever and will undoubtedly elevate your own culinary adventures. ---
Food Photography Secrets: How I Changed My Travel Blog Forever
Let me tell you a secret: I used to be terrible at food photography. Truly awful. My early travel blog posts were filled with dark, unappetizing blobs that were supposed to represent the incredible dishes I was devouring around the world. A vibrant tagine from Marrakech? Looked like a muddy stew. The delicate artistry of a Parisian pastry? More like a sad, deflated muffin. My blog, Tripsora, was growing, but my food photos were holding it back, doing a disservice to the delicious stories I wanted to tell.
Then, something shifted. It wasn't a sudden epiphany, but a slow, deliberate journey that began in a tiny ramen shop in Kyoto. The steam rising from a bowl of perfectly crafted Tonkotsu, the way the light caught the glistening broth, the chef's focused hands… I tried to capture it, but my iPhone photo was, predictably, flat and lifeless. That’s when it hit me: I wasn't just documenting food; I was trying to capture an experience, an art form, a culture. And my current skills weren't cutting it. That moment, standing amidst the slurping sounds and fragrant steam, was the genesis of a transformation that didn't just improve my photography – it changed my entire approach to travel, storytelling, and ultimately, my life and my blog.
This isn't just a guide to taking pretty pictures of your dinner. This is a roadmap to seeing food, and the world, through a new lens. It's about understanding light, composition, and storytelling so deeply that every meal becomes an opportunity for art. And trust me, once you start seeing it, you can't unsee it. Your blog, your Instagram, your memories – they'll all thank you.
1. Light is Life (and Food): The Golden Rule of Edible Aesthetics
If there’s one secret I could whisper into every aspiring food photographer's ear, it's this: master natural light. Forget expensive gear; good lighting is your most powerful tool. My early mistakes were almost always rooted in poor lighting – flash photography that killed texture, dim restaurant lighting that created shadowy voids, or harsh midday sun that blew out details.
My breakthrough came during a trip through the bustling markets of Hanoi. I was trying to photograph a vibrant bowl of Bún Chả, but the fluorescent lights of the stall were making it look sickly. I noticed a small cafe across the street, its large windows letting in soft, diffused morning light. I politely asked if I could bring my food over, and the owner, amused, agreed. The difference was astonishing. The noodles glistened, the herbs popped, the grilled pork browned beautifully.
Actionable Advice:
- Seek Window Light: This is your holy grail. Position your dish near a window, ideally one that isn't in direct, harsh sunlight. Overcast days are fantastic for soft, even light.
- Avoid Direct Sun: Direct sunlight creates harsh shadows and overexposed highlights. If you're outdoors, look for open shade (under an awning, a large tree, or on the shady side of a building).
- Turn Off the Flash: Seriously, just don't. Ever.
- Use Reflectors (DIY or Pro): A simple white napkin, a piece of white cardstock, or even your phone's screen can bounce light back onto the shadowy side of your dish, evening out the exposure and making it look more appealing. I carry a small, foldable reflector (you can find them for $10-20 online) in my bag now, and it's a game-changer for tricky restaurant lighting.
- Golden Hour Magic: If you’re photographing outdoor food (like a picnic or a market spread), the hour after sunrise and before sunset offers the most magical, warm, and soft light. I once captured the most ethereal shots of a fresh seafood platter on a beach in Santorini during golden hour – the light made the feta glow and the ocean sparkle. It was pure magic.
Understanding light wasn't just about better photos; it made me more observant. I started scouting locations not just for their food, but for their light. It transformed my travel planning, leading me to discover charming cafes with incredible natural light that I might have otherwise overlooked.
2. Composition & Angles: More Than Just an Overhead Shot
For a long time, my food photography consisted solely of overhead shots. While the "flat lay" has its place and can be incredibly effective, it's just one tool in your arsenal. Learning to play with different angles and compositions was like discovering a whole new language for my blog. It allowed me to tell more nuanced stories about the food and its context.
I remember struggling to capture the grandeur of a multi-tiered dessert in a fancy patisserie in Paris. My overhead shots made it look flat. It wasn't until I knelt down, almost eye-level with the bottom tier, that I truly appreciated its architectural beauty. The depth, the layers, the delicate decorations – they all came to life.
Actionable Advice:
- The Overhead (Flat Lay): Great for showcasing multiple dishes, intricate patterns, or when the top of the dish is the star (think pizzas, tacos, beautifully arranged salads). Ensure your camera is perfectly parallel to the table to avoid distortion.
- The 45-Degree Angle: This is your most versatile angle, mimicking how you'd naturally view food at a table. It shows depth and dimension, perfect for bowls of soup, pasta, or dishes with height. It was this angle that finally did justice to that Kyoto ramen bowl!
- The Eye-Level Shot: Best for dishes with significant height, like towering burgers, layered cakes, or drinks. It makes the food feel more imposing and real, inviting the viewer into its world. I use this often for cocktails in trendy bars in Lisbon, showcasing the intricate garnishes and the vibrant colors.
- Rule of Thirds: Imagine your frame divided into a 3x3 grid. Place your main subject (or key elements) along these lines or at their intersections. This creates a more balanced and dynamic photo than simply centering everything.
- Leading Lines: Use elements like cutlery, placemats, or the edge of a table to draw the viewer's eye towards your main subject.
- Negative Space: Don't be afraid of empty areas. Sometimes, less is more. A simple dish on a clean background can be incredibly powerful.
Experimenting with angles transformed how I saw food. It encouraged me to look beyond the obvious, to find the unique perspective that best celebrated each dish. It added a professional polish to my blog posts that was previously missing.
3. Styling & Props: Telling a Story Beyond the Plate
A plate of food, no matter how delicious, can sometimes feel a bit… lonely. This is where styling and props come in. They add context, texture, and personality, transforming a simple food photo into a compelling narrative. But there's a fine line between adding character and clutter.
My early attempts at styling were disastrous. I'd throw in every colorful napkin and interesting utensil I could find, resulting in a chaotic mess. It wasn't until I was in a bustling spice market in Fez, Morocco, trying to photograph a beautifully presented tagine, that I understood the power of relevant props. The vendor offered me a small, ornate spoon and a sprinkle of fresh cilantro. Simple, authentic, and perfectly complementary. It told a story of the place, the ingredients, and the culinary tradition.
Actionable Advice:
- Keep it Simple & Authentic: Your props should enhance, not distract. Think about what naturally belongs with the dish or in the setting.
- Background Matters: A rustic wooden table, a clean white tablecloth, or a colorful patterned tile can make a huge difference. Avoid busy or distracting backgrounds that pull focus from the food. I often carry a small, foldable placemat or a piece of textured fabric in my bag for impromptu shoots.
- Texture is Key: Incorporate elements with interesting textures: linen napkins, wooden boards, ceramic bowls, fresh herbs, crumbs, or a sprinkle of spice.
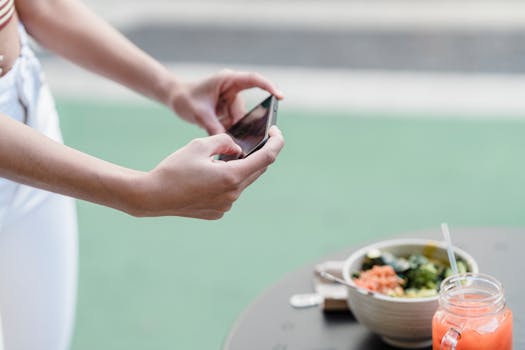
- The Human Element: A hand reaching for a fork, pouring a drink, or holding a piece of bread adds warmth, scale, and a sense of immediacy. It makes the viewer feel like they're part of the experience.
- Ingredient Story: If possible, include a key ingredient in the background – a sprig of rosemary next to a lamb dish, a lemon wedge beside seafood, or a scattering of coffee beans with a latte.
- Utensils & Napkins: Choose simple, elegant cutlery. A slightly rumpled linen napkin can add a casual, inviting feel.
- Less is More: When in doubt, remove an item. You want the food to be the undisputed star.
Learning to style transformed my travel experiences. I started noticing the small details – the worn wooden tables in a Roman trattoria, the unique pottery in a ceramic shop in Oaxaca, the vibrant textiles in a market stall in Bangkok. These weren't just backdrops; they were integral parts of the culinary story.
4. Editing Magic: Enhancing, Not Changing
This is where the true "pro" touch comes in, even if you're just using your phone. Raw photos, even well-shot ones, often lack that final pop. Editing isn't about creating something that wasn't there; it's about bringing out the best in what you’ve captured, making colors sing, and textures stand out. For my travel blog, authenticity is paramount, so my editing philosophy is always "enhance, don't fake."
I vividly remember the first time I properly edited a food photo. It was a simple shot of a street-side mango sticky rice in Chiang Mai. The colors were a bit muted in the original. With a few tweaks in Lightroom Mobile (which has a fantastic free version!), the mango turned a glorious golden, the sticky rice gleamed, and the coconut milk drizzle looked incredibly inviting. It was like magic, transforming an average photo into an irresistible one.
Actionable Advice (Mobile Apps Like Lightroom Mobile or Snapseed):
- Exposure: Adjust overall brightness. Don't overexpose and blow out details, or underexpose and lose information in the shadows.
- Contrast: Increase contrast slightly to make colors and textures more vibrant. Be careful not to go too far, or your photo will look unnatural.
- Highlights & Shadows: Recover detail in blown-out highlights (bright areas) or deep shadows (dark areas). This is crucial for maintaining texture.
- Whites & Blacks: Adjust these to define the brightest whites and darkest blacks in your image, giving it more punch.
- Saturation & Vibrance: Use sparingly! Vibrance boosts muted colors without over-saturating skin tones or already bright colors. Saturation affects all colors equally. A slight boost can make food look more appetizing.
- Sharpness: A subtle increase in sharpness can make details pop.
- White Balance: This is critical for accurate color. If your photo looks too yellow or too blue, adjust the white balance to make whites appear truly white. This is often the first thing I adjust.
- Crop & Straighten: Always ensure your horizons are straight and crop out any distracting elements.
My editing routine typically takes no more than 1-2 minutes per photo, but it makes all the difference. It's the final polish that elevates a good photo to a great one, ensuring that my blog photos are always Instagram-ready and truly represent the deliciousness I'm sharing.
5. The Human Element & Storytelling: Beyond the Plate
While the food itself is the star, the story around it is what truly makes a food photo compelling for a travel blog like Tripsora. Who made it? Who's eating it? What's the atmosphere like? These questions add layers of narrative that transform a simple food shot into a vibrant travel memory.
I learned this lesson profoundly during a cooking class in Florence. Instead of just photographing the finished pasta dish, I captured the chef's flour-dusted hands kneading dough, the students laughing as they rolled gnocchi, and finally, everyone gathered around a communal table, glasses clinking, savoring the fruits of their labor. These photos weren't just about the food; they were about the joy, the connection, the experience. They instantly became some of my most shared and commented-on posts.
Actionable Advice:
- Capture the Process: If you're in a market, photograph the vendor arranging their produce. In a restaurant, discreetly capture the chef plating a dish (if appropriate and allowed).
- Hands in Action: A hand holding a fork, sprinkling an ingredient, or raising a glass adds a dynamic, relatable element.
- The Eater: Sometimes, a blurred background with someone enjoying the food in the foreground (or vice-versa) tells a powerful story. Capture the laughter, the concentration, the pure enjoyment.
- The Environment: Show glimpses of the restaurant's decor, the bustling street market, or the scenic backdrop where you're eating. This adds crucial context to your travel story.
- Emotion: Try to capture the feeling of the moment – the warmth of a coffee shop, the excitement of a street food stall, the intimacy of a shared meal.
Incorporating the human element and focusing on storytelling didn't just make my food photos better; it made my entire travel blog richer. It shifted my perspective from merely documenting to truly experiencing and sharing the cultural tapestry woven around food. It’s what makes my readers feel like they’re right there with me, tasting and experiencing everything.
6. Practice & Persistence: The Secret Ingredient for Success
Like any skill, food photography takes practice. Lots of it. My journey from amateur to "pro" wasn't overnight. It was built on countless blurry photos, frustrating attempts, and moments of wanting to give up. But every single time, the desire to truly capture the essence of a dish, to do justice to the culinary artistry I encountered, pushed me forward.
I still experiment with every meal, even at home. My friends now just expect me to spend a few minutes rearranging the plates and finding the perfect light before we eat. It’s become second nature, a part of my process. And that consistency is what truly transformed my blog.
Actionable Advice:
- Shoot Often: The more you shoot, the better you'll get. Photograph everything – your breakfast, your home-cooked meals, your coffee.
- Analyze Your Work: After each shoot, look at your photos critically. What worked? What didn't? Why? What could you do differently next time?
- Learn from Others: Follow food photographers and food bloggers you admire on Instagram. Analyze their compositions, their lighting, their styling. Don't copy, but draw inspiration.
- Don't Be Afraid to Experiment: Try new angles, new props, different lighting setups. You never know what magic you might stumble upon.
- Embrace Imperfection: Not every photo will be a masterpiece. That's okay. Learn from the "failures" and move on.
- Invest in Knowledge, Not Gear (Initially): While a good camera helps, understanding the principles of photography is far more valuable. Start with your phone, master these techniques, and then consider an upgrade if you feel limited.
This journey has been more than just about photography; it's been about seeing the world with greater intention. It's about appreciating the artistry in a simple meal, the story behind a local dish, and the joy of sharing those discoveries. My blog, Tripsora, has flourished because of this dedication. My engagement has skyrocketed, I've landed collaborations with incredible restaurants and tourism boards, and most importantly, I feel a deeper connection to the places I visit and the food I eat.
A Life Changed, One Delicious Photo at a Time
My transformation from a clumsy food photographer to someone who consistently captures mouth-watering, story-driven images didn't just elevate my travel blog; it enriched my entire travel experience. It taught me patience, observation, and a profound appreciation for the culinary arts and the cultures they represent. Every meal is now an adventure, an opportunity to create and share beauty.
So, next time you sit down to a delicious meal, whether it’s street food in Bangkok or a Michelin-starred dish in Paris, don't just eat it. See it. Frame it. Tell its story. You don't need expensive equipment; you just need curiosity, a keen eye, and the willingness to practice.
What dish are YOU excited to photograph next? Share your food photography adventures with us on social media! Tag @Tripsora and use #TripsoraFoodie and #ProFoodPhoto to show us your masterpieces. We can't wait to see how you're changing your own culinary world, one incredible photo at a time!
---
More pictures
Tags
Share this guide
We may earn a commission if you click a link and buy a product or service, at no extra cost to you. How affiliate links work.
Been there?