
Ever wondered how Instagram influencers make their indoor travel photos look so effortlessly perfect, even in dim hotel rooms or bustling cafes? It’s not just expensive gear – it’s clever lighting. Get ready to uncover the insider secrets that will transform your travel photography from drab to fab, no studio required!
Let's be real. We've all been there. You're exploring a gorgeous, historic café in Florence, the aroma of fresh espresso filling the air, the pastries looking like edible works of art. You pull out your phone, ready to capture that perfect, drool-worthy Instagram shot… and then BAM! Your photo looks dark, grainy, and utterly uninspiring. The vibrant colors are muted, the details are lost, and you wonder how on earth those Instagram influencers make their shots look so effortlessly perfect, even in the gloomiest corners of the world.
For years, I struggled with this exact dilemma. My outdoor travel photos? Chef's kiss! But the moment I stepped indoors – whether it was a cozy Airbnb in Kyoto, a bustling market stall in Bangkok, or a dimly lit trattoria in Rome – my camera seemed to betray me. My pictures were blurry, noisy, and frankly, just sad. I'd scroll through my feed, seeing influencers posing flawlessly in their chic hotel rooms or sipping lattes by a sun-drenched window, and I’d think, "They must have professional lighting crews following them around!"
Then, on a trip to Lisbon, something clicked. I was staying in this incredibly charming boutique hotel, all dark wood and intimate lighting. I was trying to photograph a beautifully arranged breakfast spread – pastel de nata, fresh fruit, strong coffee – but the room was just too dim. Frustrated, I noticed a crisp, white pillowcase on the bed. On a whim, I propped it up behind the food, angled towards the only window in the room. Suddenly, the entire scene brightened, the shadows softened, and the colors popped. It wasn't perfect, but it was a revelation. It wasn't about expensive gear; it was about understanding and manipulating light.
That moment changed everything for me. I started experimenting, observing, and learning. I discovered that those "effortless" influencer shots weren't magic – they were the result of clever, often incredibly simple, lighting tricks that anyone can master with their smartphone or camera. And guess what? Most of these tricks involve using things you already have or can find anywhere you travel.
So, put away your frustration. Today, I'm pulling back the curtain and sharing the insider lighting secrets that Instagram influencers (and professional photographers) use to make their indoor travel photos absolutely stunning. Get ready to transform your feed, one perfectly lit shot at a time!
---
1. The Golden Hour… Indoors! Mastering Natural Window Light
Forget fancy studio lights; the best light source you have is often right outside your window. Natural light is soft, flattering, and free! The trick is knowing how to find and manipulate it.
- Hunt for the Best Window: Not all windows are created equal. Look for windows that offer indirect, diffused light. Direct sunlight can be too harsh, creating strong shadows and blown-out highlights. North-facing windows often provide consistent, soft light throughout the day. East-facing windows are great in the morning, west-facing in the afternoon. South-facing windows can be tricky due to direct sun, but sometimes offer beautiful light if the sun is high.
- My Tip: When I’m checking into a new hotel or Airbnb, the first thing I do is scout the windows. I’ll even move furniture around (respectfully, of course!) to get my subject closer to the best light source. In a charming little Airbnb in the Marais district of Paris, I once dragged a small table right up to the window to photograph my morning croissant and coffee. The result? Pure Parisian perfection!
- Diffuse Harsh Light: If the sunlight streaming through a window is too strong, don't despair. You need to diffuse it.
- Sheer Curtains: These are your best friend. They act as a natural diffuser, scattering the light evenly.
- White Sheets/Towels: No sheer curtains? Grab a white bedsheet, a thin white towel, or even a plain white t-shirt. Drape it over the window or hold it up to soften the light. Remember that Lisbon pillowcase? It works!
- Frosted Glass/Blinds: If your window has frosted glass or adjustable blinds, use them to your advantage. Angle the blinds to let in just the right amount of soft light.
- Reflect Light Back: Light is precious, especially indoors. Once you've found your light source, think about how you can bounce it back onto your subject.
- White Walls: Position your subject near a white wall opposite the window. The wall will act as a giant reflector, filling in shadows.
- Everyday Reflectors: Don't have a professional reflector? No problem! A white piece of cardboard, a large white menu from a cafe, a white placemat, or even a laptop screen displaying a white image can all bounce light back onto your subject, brightening up their face or your delicious meal. I've even used the back of a shiny metal tray in a fancy hotel for a subtle highlight!
---
2. DIY Studio Magic: Everyday Items as Lighting Tools
You don't need expensive ring lights or professional strobes to create stunning indoor photos. Your phone, a tablet, and even humble lamps can be transformed into powerful lighting tools.
- Your Smartphone Flashlight (and a Friend!): This is perhaps the most underrated tool in your arsenal. Don't use your phone's built-in flash directly on your subject – it creates harsh, unflattering light. Instead, use another phone's flashlight (or a small, portable LED light if you have one) as an off-camera light source.
- Fill Light: Position the flashlight slightly to the side of your main light source (e.g., a window) to fill in shadows and add a bit of sparkle. Ask a friend to hold it for you, or prop it up on a stack of books.
- Rim Light/Hair Light: For portraits, position the flashlight behind your subject, slightly to one side, aimed at their head and shoulders. This creates a beautiful "rim" of light that separates them from the background, adding depth and a professional touch. I've used this trick countless times in dimly lit bars in Berlin to get those moody, yet well-defined, portrait shots of my friends.
- Backlight for Food: For food photography, place the flashlight behind the dish, slightly elevated, pointing towards your camera. This creates a beautiful glow and highlights textures.
- Lamps and Ambient Lights: Hotel lamps, desk lamps, and even decorative lights in cafes are not just for illumination – they're potential light sources for your photos.
- Reposition & Soften: Can you move a lamp closer to your subject? Can you angle it to bounce light off a wall? Sometimes, simply placing a thin white napkin over a lamp (safely, of course, avoiding direct contact with hot bulbs!) can diffuse its harshness.
- Candles & Fairy Lights: These aren't just for ambiance; they're fantastic for adding warmth, bokeh, and a dreamy quality to your photos. Use them as foreground elements or in the background to create beautiful out-of-focus light points. I once used a strand of fairy lights I carry in my travel bag to illuminate a flat lay of souvenirs in a tiny Airbnb in Kyoto, creating a magical, warm glow around my Japanese handicrafts.
- Tablet/Laptop Screen as a Fill Light: This is a fantastic hack for flat lays or close-up portraits. Open a blank white document or a plain white image on your tablet or laptop. The screen emits a soft, even light that can be positioned perfectly to fill in shadows or add a subtle glow. I’ve used my iPad screen countless times to brighten up a delicious pasta dish in a dimly lit trattoria in Rome, making it look much more appetizing than the ambient light allowed.
---
3. The Art of the Silhouette & Shadow Play: Embrace the Dark Side
Sometimes, fighting low light is a losing battle. Instead, learn to embrace it and use shadows to your creative advantage. Not every photo needs to be perfectly lit and bright. Mood, drama, and mystery can be incredibly captivating.
- Dramatic Silhouettes: When you have a strong light source behind your subject (like a bright window or doorway), but the foreground is dark, don't try to brighten everything. Instead, expose for the background light and let your subject fall into a beautiful silhouette. This creates a powerful, artistic image that tells a story without revealing every detail.
- My Anecdote: In a stunning old Parisian apartment with tall windows overlooking a bustling street, I captured a friend looking out. The window light was brilliant, but the room was quite dark. Instead of trying to illuminate her face, I exposed for the bright outside, letting her become a striking silhouette against the city backdrop. It’s still one of my favorite moody shots.
- Play with Shadows for Mood and Depth: Shadows aren't always bad! They can add depth, texture, and a sense of drama to your photos. Look for interesting shadow patterns cast by windows, furniture, or architectural elements.
- Window Shadows: Early morning or late afternoon sun can cast beautiful, long shadows from windowpanes onto walls or floors. Use these lines and patterns to create interesting compositions.
- Object Shadows: Arrange objects (like coffee cups, books, or plants) to cast intentional shadows that add visual interest to your flat lays or still life shots. This is a game-changer for product photography or showcasing your travel finds.
---
4. Angles, Composition, and the Rule of Light
It's not just where the light is coming from, but how you position your camera and subject relative to that light. A slight change in angle can make a world of difference.
- Position Your Subject (and Yourself) Relative to the Light:
- Front-lit: The light source is directly in front of your subject, illuminating them evenly. This is great for clear, bright shots but can sometimes look a bit flat.
- Side-lit: The light source is to the side of your subject. This creates beautiful shadows and highlights, adding depth and dimension. This is often the most flattering for portraits and food.
- Backlit: The light source is behind your subject. As discussed, this can create stunning silhouettes, or if you add some fill light, a beautiful glow around your subject.
- Avoid Direct Overhead Light: Overhead lights (like ceiling fixtures) are usually the least flattering. They cast harsh shadows under eyes, noses, and chins, making subjects look tired or gaunt. If you can, turn them off and rely on natural window light or strategically placed lamps. If you can't turn them off, try to position your subject slightly away from the direct overhead light.
- Shoot Towards the Light (Carefully): While it might seem counterintuitive to shoot into the light, doing so can create beautiful effects like lens flares (if desired) and that dreamy, ethereal glow. When shooting towards a window, expose for the subject's face (if it's a portrait) or the main element you want to highlight. Your camera's meter might get confused by the bright background, so you might need to tap on your subject to tell your phone/camera to expose for them, or manually adjust your exposure compensation (often a sun icon or +/- slider on your phone).
- My Realization: I used to always turn my back to a window in a café, trying to get enough light on my face. But one afternoon in a cozy Amsterdam canal-side café, I noticed how beautiful the light was coming through the window, illuminating the steam from my tea. I turned my camera to face the window, letting the light hit the mug, and tapped to expose for the tea. The resulting shot was so much more dynamic and atmospheric than any "properly lit" shot I'd taken before.
---
5. Post-Processing Power-Up (Subtle, Not Fake)
Even with the best lighting tricks, indoor photos often need a little post-processing love. This isn't about making your photos look fake; it's about enhancing what's already there and bringing out the best in your shot. Think of it as putting on a little makeup – it enhances your natural beauty, it doesn't transform you into someone else.
- Essential Editing Apps:
- Lightroom Mobile (Free version is powerful): My go-to for comprehensive edits.
- Snapseed (Free): Google's fantastic app with incredibly intuitive tools.
- VSCO (Free/Paid): Great for beautiful film-like filters and subtle adjustments.
- Key Adjustments for Indoor Shots:
- Exposure: The most crucial. Gently increase if your photo is too dark. Be careful not to blow out highlights.
- Highlights & Shadows: Reduce highlights to recover detail in bright areas (like a window view). Boost shadows to reveal detail in darker areas without making the whole photo too bright.
- Whites & Blacks: Adjusting these can add contrast and "pop."
- Temperature & Tint: Indoor lighting can often have a color cast (e.g., yellow from incandescent bulbs, blue from window light on a cloudy day). Adjust temperature (warm/cool) and tint (green/magenta) to get natural-looking colors. A touch of warmth usually makes indoor shots feel cozier.
- Clarity/Texture: A slight bump can bring out details, especially in food or textured surfaces.
- Sharpening: Low-light photos can often look a bit soft. A small amount of sharpening can make a huge difference, but don't overdo it or you'll get a grainy look.
- Noise Reduction: If your low-light photo is grainy, use noise reduction sparingly. Too much can make your photo look plasticky.
- My Editing Mantra: Less is often more. Make subtle adjustments that enhance the natural beauty of the scene, rather than drastically altering it. The goal is to make people say, "Wow, that's a beautiful photo!" not "Wow, that's a heavily edited photo!" I remember taking a photo of a vibrant spice stall in a bustling market in Bangkok. It was a bit dim, but with a slight bump in exposure, a touch of warmth, and a careful increase in clarity in Lightroom Mobile, the spices came alive, looking rich and inviting.
---
6. Gear That Helps (But Isn't Essential)
While the core of these tricks relies on creativity and understanding light, there are a few affordable gadgets that can elevate your indoor photography even further. These are nice-to-haves, not must-haves.
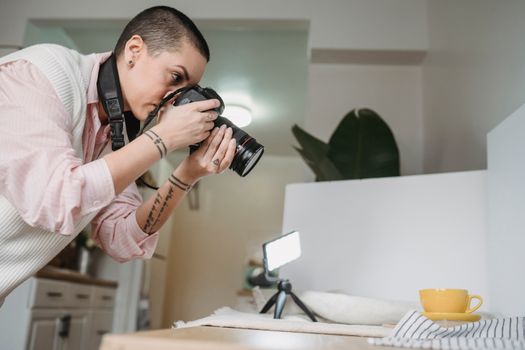
- Small Portable LED Panel (~$20-$50): Devices like the Lume Cube Mini, Ulanzi VL49, or similar compact LED lights are incredibly versatile. They're small enough to fit in your pocket, rechargeable, and offer adjustable brightness and sometimes even color temperature.
- How I Use It: I use mine for flat lays, product shots, or as a subtle fill light for portraits when natural light is truly absent. My Lume Cube was a game-changer for getting perfectly lit flat lays of my travel journals and souvenirs in tiny Airbnb bathrooms or on cramped hotel desks.
- Mini Tripod / GorillaPod (~$15-$30): For extremely low-light situations, stability is key to avoid blurry photos. A small tripod allows you to use longer exposure times without camera shake.
- How I Use It: I'll prop my phone on a mini tripod for night shots inside a cathedral or for perfectly still flat lays, especially if I'm using a self-timer.
- Clip-On Smartphone Lenses (~$10-$40): While not directly related to lighting, a wide-angle clip-on lens can help you capture more of an indoor scene, especially in small rooms, making the most of the available light across a broader area. A macro lens can be fun for extreme close-ups of food or intricate details.
---
Conclusion: Your Indoor Photography Glow-Up Starts Now!
There you have it – the "secrets" Instagram influencers use to make their indoor photos pop, demystified and put right into your hands. From mastering natural window light and transforming everyday items into powerful reflectors, to embracing dramatic shadows and finessing your shots with subtle post-processing, you now have a toolkit to elevate your indoor travel photography from frustrating to absolutely fabulous.
Remember that Lisbon pillowcase moment? It taught me that creativity often trumps expensive gear. It's about observation, experimentation, and a willingness to play. So, the next time you find yourself in a dimly lit café, a cozy hotel room, or a vibrant indoor market, don't despair. Instead, look for the light, get creative with your surroundings, and capture those stunning moments that truly reflect your travel experience.
Now it's your turn! Grab your phone or camera, find a window, and start experimenting. Don't be afraid to try different angles, move things around, and play with shadows. The world is your studio, and every indoor space holds potential for a breathtaking shot. Share your glowing indoor shots with us using #TripsoraLightHacks – we can’t wait to see your masterpieces!
More pictures




Tags
Share this guide
We may earn a commission if you click a link and buy a product or service, at no extra cost to you. How affiliate links work.
Been there?