
Ever found yourself in a breathtaking indoor space, only for your photos to turn out dark and uninspiring? You're not alone! This post reveals ingenious, budget-friendly lighting tricks that will transform your indoor travel photography, ensuring your memories shine as brightly as the moments themselves. ---
Secret Lighting Hacks: Elevate Your Indoor Travel Photos from Dull to Dazzling (Before Everyone Else Does!)
I’ll never forget that rainy afternoon in Paris. We were tucked away in a charming little salon de thé near the Marais, the kind with velvet armchairs, antique mirrors, and the most exquisite tarte Tatin I’d ever seen. The ambiance was pure magic, a cozy haven from the drizzly grey outside. My camera was practically glued to my hand, ready to capture every detail.
But then, frustration set in. The soft, romantic glow that made the place so enchanting was, for my lens, a nightmare. Every shot of my delicious pastry, the intricate ceiling, or even my friend laughing across the table, came out looking… flat. Grainy. Dull. It was like trying to photograph a dream through a thick, dusty curtain. My heart sank. Here I was, living a postcard moment, and my photos were doing it zero justice.
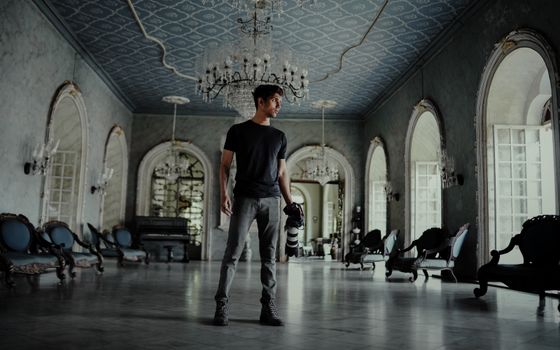
Sound familiar? We’ve all been there. From the dimly lit grandeur of ancient cathedrals in Rome to the cozy, atmospheric izakayas of Tokyo, or the vibrant chaos of an indoor market in Marrakech, beautiful indoor spaces often present the biggest photographic challenges. Natural light is scarce, artificial light is often unflattering, and pulling out a bulky flash feels intrusive and just… wrong.
But what if I told you there’s a whole arsenal of "underground" lighting tricks you can employ – often with items you already carry, or cheap gear that slips into your pocket – to transform those dim, disappointing shots into vibrant, shareable masterpieces? These aren't your typical "use the golden hour" tips; these are the guerrilla tactics I've honed on countless trips, the ones that make people ask, "How did you get that shot?!"
Get ready, because we're about to dive into the world of creative indoor lighting, before these genius hacks become mainstream.
1. The Pocket Sun: Unleashing the Power of the Portable LED Panel
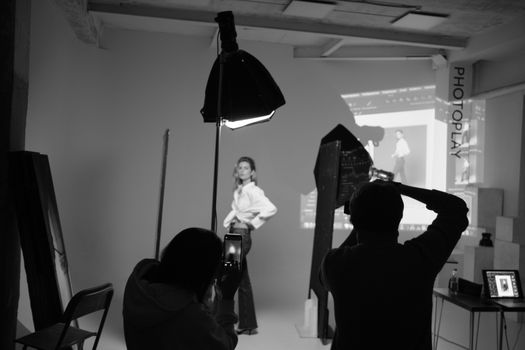
Forget bulky studio lights. Your new best friend for indoor photography is the pocket-sized LED panel. These little powerhouses, like the Lume Cube, Godox L30, or Aputure MC, are game-changers. They're typically no bigger than a deck of cards, weigh next to nothing, and often cost between $30 and $100. The magic? They're dimmable, color-adjustable (meaning you can match the warmth of existing lights or add a cool touch), and incredibly versatile.
How to Use It Like a Pro:
- Fill Light for Faces: My go-to move in dimly lit restaurants or cafes. Position the LED panel slightly above and to the side of your subject (or yourself, if you’re doing a selfie or a self-portrait). Start at a low brightness and gradually increase it. This subtly fills in harsh shadows under eyes and noses, making faces pop without looking artificially lit. I once used a Lume Cube to perfectly illuminate my friend's face as she admired the intricate frescoes in a dimly lit chapel in Florence, giving her eyes a beautiful catchlight that sparkled.
- Backlight for Drama: Place the LED panel behind your subject, slightly out of frame, pointing towards the camera. This creates a beautiful rim light or "halo" effect, separating your subject from the background and adding depth. Imagine a shot of a local artisan working on their craft in a dimly lit workshop in Hoi An – a subtle rim light can make their hands and tools truly stand out.
- Tabletop Food Photography: This is where the pocket sun truly shines. In that Parisian salon de thé incident, if I’d had my Aputure MC, I would have held it above and slightly behind my tarte Tatin, bouncing some light off a white napkin to fill in the front. This adds dimension and sparkle to food, making it look as delicious as it tastes. I’ve used this trick countless times in the moody tapas bars of Seville, making glistening jamón and vibrant paella look irresistible.
- Bounce It! Don't just point it directly. If there's a white wall or ceiling nearby, point your LED panel at it. The bounced light will be softer, more diffused, and incredibly flattering, mimicking a much larger light source.
2. The Reflective Rebel: Everyday Objects as Your Secret Light Bouncers
You don't always need fancy gear. Some of the most effective lighting tools are already in your bag, or on your table. Think of anything white, reflective, or even slightly shiny as a potential light bouncer. This is the ultimate "guerilla gaffer" technique.
How to Use It Like a Pro:
- The White Menu/Napkin: In a restaurant, a crisp white menu or even a folded napkin can be your best friend. Position it on the side of your subject (or food) opposite the main light source (e.g., a window or a lamp). It will bounce light back into the shadows, softening them and adding detail. I’ve used a white paper take-out bag from a street food vendor in Bangkok to bounce light onto a particularly photogenic bowl of Pad Thai, instantly making it look more appetizing.
- Aluminum Foil (Crinkled for Diffusion): Got a piece of aluminum foil from a packed lunch? Don't throw it away! Crinkle it up slightly, then smooth it out. This creates a textured surface that acts as a fantastic diffuse reflector. It’s perfect for adding sparkle to drinks or food, or for filling in smaller shadows on portraits. I once used a piece of foil from a chocolate bar to create a subtle highlight on a friend's cocktail in a dimly lit speakeasy bar in New York.
- Hotel Bathrobe/White Shirt: If you're shooting a portrait in a hotel room, drape a white towel or bathrobe over a chair, or even ask a travel companion to hold up a white shirt. This creates a larger, softer bounce surface than a menu, ideal for more even lighting on faces.
- Shiny Surfaces: Don't underestimate the power of a shiny table, a polished floor, or even a glass window. These can reflect ambient light back onto your subject. Pay attention to how light interacts with these surfaces and position your subject accordingly.
3. The Window Whisperer: Befriending the Beam of Natural Indoor Light
Even indoors, natural light is often the most beautiful and flattering. The trick is understanding how to harness it, even when it seems scarce or challenging. This isn't just about finding a window; it's about understanding what that window light is doing.
How to Use It Like a Pro:
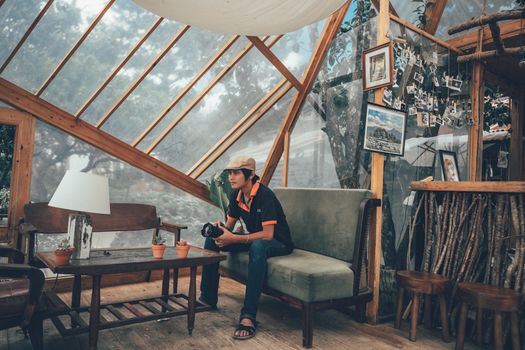
- The Softbox Effect: A window with sheer curtains acts like a giant softbox, diffusing harsh sunlight into a soft, even glow. Position your subject facing the window for even, flattering light. If there are no curtains, step back a bit from the window, or wait for an overcast day, which provides naturally diffused light. I vividly remember a rainy morning in a quaint Airbnb in Amsterdam, the soft light streaming through the lace-curtained window, perfectly illuminating my morning coffee and pastry. It was editorial-worthy without any extra gear.
- Side-Lighting for Drama: Position your subject perpendicular to the window. One side of their face (or object) will be lit, and the other will fall into shadow, creating depth and a dramatic, artistic look. This is fantastic for capturing the textures of ancient artifacts in a museum or the intricate details of a craft in a market stall.
- Backlighting for Halos: Place your subject directly in front of a window, with the window light behind them. This creates a beautiful silhouette or a dreamy halo effect around their hair or edges. It's stunning for portraits or for highlighting the outline of architectural features. I once shot a friend against a large ornate window in a medieval castle in Scotland, the backlight creating an ethereal glow around her hair, making her look like she'd stepped out of a fairytale.
- Golden Hour Indoors: Don't just think golden hour is for outdoors! When the sun is low, its rays stream further into rooms, creating warm, long shadows and a magical glow. Pay attention to how the light moves through your hotel room or a cafe during this time.
4. Your Phone's Secret Powers: More Than Just a Flashlight
You've got a second phone, right? Or maybe a laptop? These ubiquitous devices hold surprising potential for creative indoor lighting. Forget the harsh, unflattering built-in flash of your primary camera. We're talking about subtle, controlled illumination.
How to Use It Like a Pro:
- The Diffused Phone Flashlight: Take a second phone, turn on its flashlight, and then place a piece of tissue paper, a thin napkin, or even a finger over the light source. This diffuses the harsh beam into a softer, more manageable light. It's perfect for highlighting small details, like the intricate patterns on a ceramic plate in a market in Lisbon, or the delicate swirls of foam art on a latte.
- The Phone Screen Softbox: Open a blank white screen on your second phone (or tablet/laptop). Turn the brightness all the way up. This creates a surprisingly soft, even, and continuous light source. Hold it close to your subject for a subtle fill light, especially for close-up shots of food, jewelry, or small souvenirs. I've used my iPad screen countless times to softly illuminate a new piece of artisan jewelry I bought in Oaxaca, Mexico, making the silver gleam without harsh reflections.
- Color Temperature Control: Many phone flashlights have a slightly cool, blueish tint. If you want to warm it up, try placing a yellow or orange piece of cellophane (from a candy wrapper, perhaps?) over the diffused light. Experiment!
- Eye Lights for Portraits: For a quick portrait in a moody bar, a phone screen held slightly below your subject's face can create a subtle, flattering "clamshell" lighting effect, adding a sparkle to their eyes. Just be mindful of reflections in glasses!
5. Embracing the Ambiance: Guerrilla Gaffer Tactics with Existing Lights
Sometimes, the best light isn't the one you bring, but the one you find. Every lamp, candle, string of fairy lights, or neon sign in an indoor space is a potential light source waiting to be creatively integrated into your shot. The key here is to observe, adapt, and use what’s already there to enhance the mood.
How to Use It Like a Pro:
- Lamps as Key Lights: Don't just avoid overhead lights; look for table lamps or floor lamps. These often emit a warm, inviting glow. Position your subject so the lamp acts as a primary light source, creating beautiful shadows and highlights. In a cozy ryokan in Kyoto, the soft glow of a traditional paper lantern became the perfect key light for a serene portrait of my friend sipping tea, enhancing the tranquil atmosphere.
- Fairy Lights & String Lights: These are a goldmine for adding magical bokeh and atmosphere. Use them in the background (out of focus) to create dreamy circles of light, or as a subtle foreground element to frame your shot. I once shot a late-night street food stall in Singapore that had strung up fairy lights. By positioning myself carefully, I used the blurred lights to create a magical backdrop for my chili crab dish.
- Neon Signs & LED Art: Modern cafes and bars often feature artistic neon signs or LED installations. Don't be afraid to use their unique colors and shapes as a light source or a compositional element. The vibrant glow can cast interesting hues on your subject and add a contemporary edge to your photos. Imagine a shot of a craft cocktail bar in Berlin, where the soft, colored glow of a neon sign casts an otherworldly light on the bartender at work.
- Candlelight Magic: Candles are the ultimate mood setters. For food photography or intimate portraits, use candles as your primary light source. Keep your ISO relatively high, shoot with a wide aperture (low f-number), and steady your camera (or use a mini-tripod) to capture their soft, flickering glow. The rich, warm tones are incredibly flattering. A memorable evening in a cave restaurant in Cappadocia, Turkey, lit only by candles, yielded some of my most atmospheric and shareable photos of local cuisine.
- The "Spotlight" Effect: In a museum or gallery, specific artworks are often spot-lit. Instead of trying to light the whole scene, focus on using that existing spotlight to highlight your subject or a detail. Frame your shot to emphasize the intentional lighting.
6. The "Lens Hood Diffuser": Softening Harsh Artificial Light
Sometimes, you're stuck with overhead fluorescent lights or harsh spotlights that cast unflattering shadows. While you can't turn them off, you can often soften their impact on your subject.
How to Use It Like a Pro:
- Lens Hood as a Mini Diffuser: If your camera has a lens hood, you can sometimes use it creatively. While not its primary purpose, if you're shooting a close-up and there's a harsh light directly above, you can briefly use the hood to cast a small, soft shadow over a portion of your subject, reducing glare or harsh highlights. This is more of a "last resort" trick, but it can work in a pinch for tiny details.
- The "Human Shade": If you have a travel companion, ask them to stand strategically to block some of the harsh overhead light, creating a softer shadow for your subject. This is particularly useful in places like airport lounges or convention centers with notoriously bad lighting. I've asked my partner to stand at just the right angle in a bustling airport food court to block a harsh overhead light, giving my breakfast sandwich a much more appealing look.
- Bounce off a Nearby Wall: If there's a wall or ceiling relatively close to your subject, you can use your phone's flashlight (diffused, as mentioned earlier) and point it at the wall/ceiling. The bounced light will be much softer than direct light.
7. The "Dark Mode" Advantage: Using Shadows to Your Benefit
Not every great photo needs to be brightly lit. Sometimes, embracing the darkness and using shadows creatively can lead to incredibly dramatic and artistic shots. This is about working with the low light, not against it.
How to Use It Like a Pro:
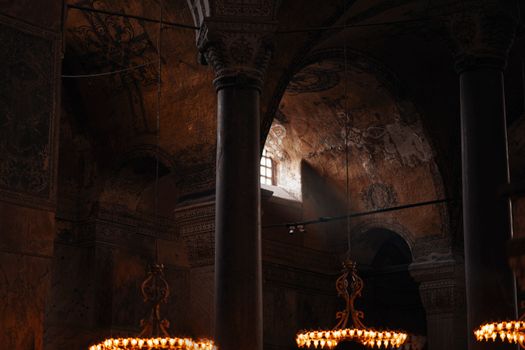
- Embrace Silhouettes: When you have a strong light source (like a window or a doorway) and a darker foreground, use it to create powerful silhouettes. Focus on the outline and shape of your subject. This is fantastic for capturing the grandeur of architectural spaces or the mystery of a person in a doorway. I love creating silhouettes of people walking through the arched doorways of old castles in Portugal, letting the bright light outside define their form.
- Highlighting with Negative Space: Use dark areas to draw attention to the small, illuminated parts of your image. A single lamp in a dark room can become a focal point, with the surrounding darkness emphasizing its glow. This technique is brilliant for capturing the intimate atmosphere of a dimly lit jazz club in New Orleans or a quiet bookstore in London.
- Playing with Contrast: Don't be afraid of high contrast. The interplay of light and shadow can add immense drama and mood to your photos. Look for scenes where light falls in interesting patterns, creating strong distinctions between bright and dark areas.
- Moody Portraits: Low light can create incredibly moody and evocative portraits. Use a single, soft light source (like a lamp or a diffused LED panel) to light one side of your subject's face, letting the other side fall into shadow. This creates a sense of introspection and depth.
---
Your Next Indoor Masterpiece Awaits!
The days of dull, lifeless indoor travel photos are officially over. With these "underground" lighting tricks, you're no longer at the mercy of poor ambient light. You're empowered to create stunning, atmospheric images that truly reflect the magic of your travel experiences. From the bustling souks to the serene temples, the cozy cafes to the grand museums, every indoor space now holds the potential for a photographic masterpiece.
So, the next time you find yourself in a beautifully dim setting, don't despair. Reach for your pocket LED, grab that white napkin, or simply observe how the light dances through a window. Experiment. Play. And most importantly, have fun transforming those fleeting moments into unforgettable visual stories.
Now go forth, fellow Tripsora travelers, and illuminate your adventures!
What are YOUR secret indoor lighting hacks? Share your before & afters and your ingenious tips with us using #TripsoraLightingHacks on Instagram and Twitter! Let's inspire each other to capture every luminous detail of our travels!
---
More pictures

Tags
Share this guide
We may earn a commission if you click a link and buy a product or service, at no extra cost to you. How affiliate links work.
Been there?