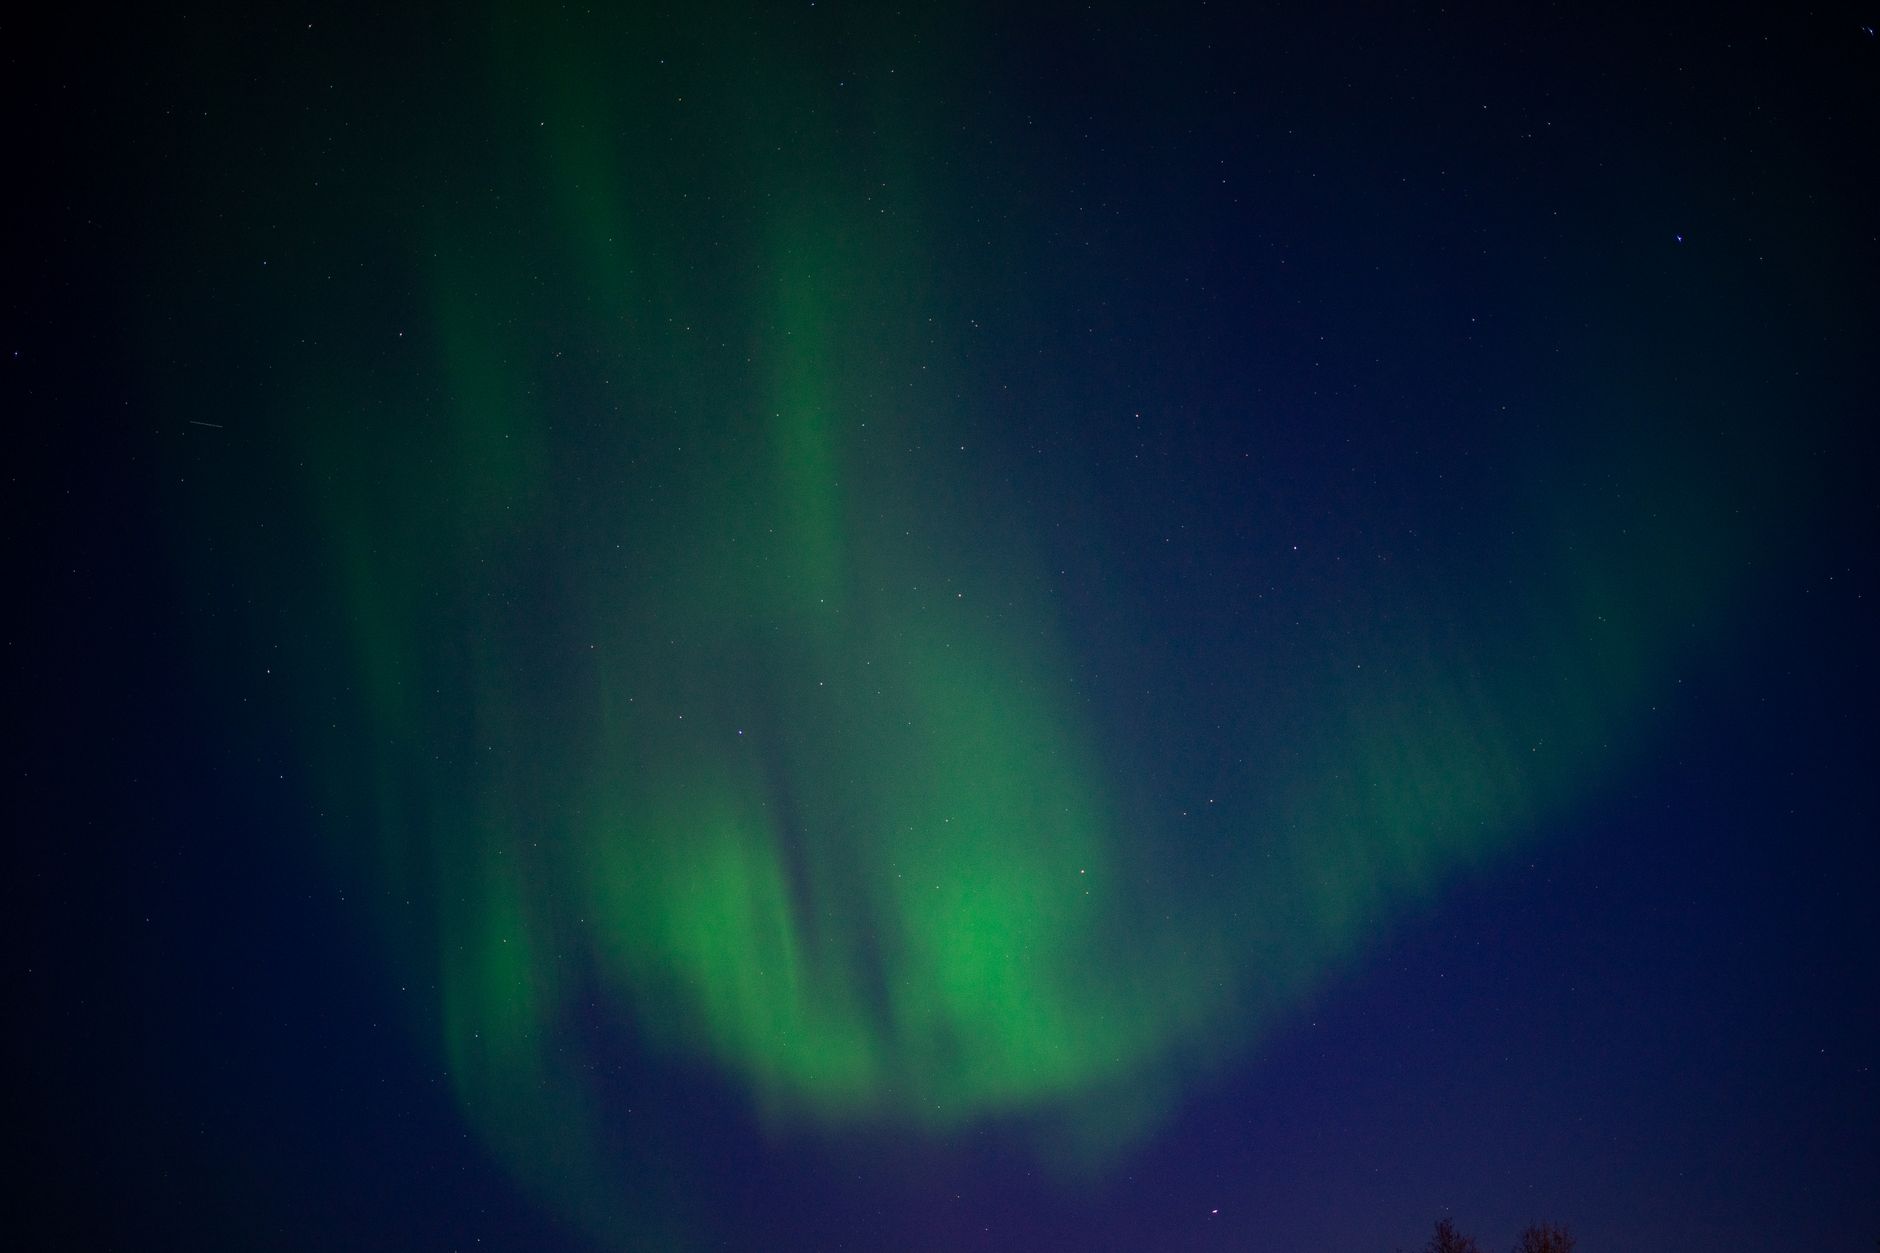
Imagine standing under a sky ablaze with emerald and violet, your camera ready to immortalize the dance of the Aurora Borealis. This comprehensive guide unlocks the secrets to photographing the Northern Lights in October 2025, transforming your dream into stunning reality. Get ready to capture the magic and share your breathtaking celestial masterpieces! ---
Chasing the Cosmic Dance: Your Ultimate Guide to Photographing the Northern Lights in October 2025
The chill air bit at my cheeks, but I barely noticed. My eyes were fixed on the inky black canvas above, waiting. It was my first time truly hunting the Northern Lights, deep in the wilderness of Finnish Lapland. Hours passed, fingers growing numb despite layers of gloves, and then, a faint whisper of green. Slowly, tentatively, it bloomed. A shimmering curtain, then another, twisting and swirling with an ethereal grace that stole my breath. My camera, perched precariously on its tripod, felt like an extension of my awe-struck self. I fumbled with settings I'd rehearsed a hundred times, my heart pounding a rhythm against the silent, snowy landscape. That night, I didn't just witness the Aurora Borealis; I captured it – a series of images that forever tell the story of a cosmic ballet.
Fast forward to October 2025, and the universe is gearing up for another spectacular show. We’re heading towards what's known as the "solar maximum," a period of heightened solar activity, meaning more frequent and intense Aurora displays. And October? It’s arguably one of the best times to witness this celestial wonder. The nights are long and dark, but the extreme cold of deep winter hasn't fully set in, offering a more comfortable (though still chilly!) experience. Plus, it's shoulder season in many prime Aurora destinations, meaning fewer crowds and potentially better prices.
If you’ve ever dreamed of freezing the Aurora’s dance in a frame, this is your year, and this is your guide. From the gear you absolutely need to the camera settings that will make your photos sing, and the very best spots to chase the light, I'm sharing everything I've learned from countless nights under the stars. Get ready to turn your Aurora dream into stunning, shareable reality.
Section 1: Why October 2025 is Your Aurora Golden Ticket
Why specifically October 2025? It's not just a random pick; it's a strategic sweet spot for Aurora hunters.
Firstly, as mentioned, we're on the ascent to the solar maximum. The sun's activity cycles roughly every 11 years, and 2025 is projected to be near the peak of Solar Cycle 25. This translates to more frequent solar flares and coronal mass ejections (CMEs), which are the primary drivers of the Aurora Borealis. Simply put, your chances of seeing a vibrant display skyrocket.
Secondly, the nights are long and dark. In the Arctic regions, October brings significant hours of darkness, crucial for spotting the relatively faint Aurora. Unlike the summer months where the sun barely sets, October offers ample opportunity for the lights to shine. Yet, it's not the brutal deep winter. The snow cover is often starting to settle, creating picturesque landscapes, but the temperatures are generally more manageable than in December or January. This means you can stay out longer, enjoy the experience more, and your camera batteries will thank you.
Finally, shoulder season benefits are a real game-changer. While popular, October typically sees fewer tourists than the peak winter months. This can mean:
- Better accommodation prices: More options, potentially lower rates.
- Fewer crowds: More serene viewing experiences, less competition for prime photography spots.
- Easier travel: Less congested airports and roads.
So, mark your calendars. October 2025 isn't just a good time; it's potentially the best time to capture the Northern Lights.
Section 2: The Essential Gear Guide: What's In My Bag (and Should Be In Yours!)
You can't capture magic with just any old setup. Here's a breakdown of the gear that’s non-negotiable for serious Aurora photography, based on my own trial-and-error (and frozen fingers!):
- Camera Body: DSLR or Mirrorless (Full-Frame Preferred)
- Why: You need a camera that performs well in low light and allows full manual control. Full-frame sensors generally handle high ISOs (which you'll need) with less noise than crop sensors.
- My Recommendation: Canon EOS R5/R6, Sony A7S III/A7 III, Nikon Z6/Z7 II. If you're on a budget, older full-frame DSLRs like the Canon 5D Mark IV or Nikon D750 are still fantastic. Even a good crop-sensor camera like the Fujifilm X-T4 or Sony A6600 can do a decent job with the right lens.
- Pro Tip: Make sure it has a 'bulb' mode or allows for shutter speeds longer than 30 seconds.
- Lens: Wide-Angle and Fast Aperture
- Why: To capture as much of the sky as possible and let in maximum light. A fast aperture (low f-number) is crucial.
- My Recommendation: Look for lenses with an aperture of f/2.8 or wider (f/1.8, f/1.4). Focal lengths between 14mm and 24mm (on full-frame) are ideal.
- Examples: Sigma 14-24mm f/2.8 Art, Sony FE 14mm f/1.8 GM, Nikon Z 14-30mm f/4 S (f/4 is acceptable if the Aurora is strong), Canon RF 15-35mm f/2.8L IS USM. Prime lenses (fixed focal length) are often sharper and faster.
- Crucial: Ensure your lens has a manual focus ring and an infinity focus mark.
- Sturdy Tripod: Non-Negotiable!
- Why: You'll be using long exposure times, so any camera shake will ruin your shot. A flimsy tripod is worse than no tripod.
- My Recommendation: Invest in a carbon fiber tripod for its strength-to-weight ratio and resistance to cold. Look for one that can extend to eye level and has a solid ball head. Manfrotto, Gitzo, and Leofoto are reputable brands.
- Anecdote: I once tried to save a few bucks on a cheap tripod. One windy night in Norway, my camera nearly became a Viking offering to the sea. Never again!
- Remote Shutter Release (Cable or Wireless)
- Why: Pressing the shutter button directly can introduce camera shake, especially with long exposures.
- My Recommendation: A simple wired remote is reliable and doesn't rely on batteries (though your camera might). Wireless ones are convenient but can be affected by cold. Many cameras also have built-in intervalometers or app control via Wi-Fi/Bluetooth, which can work.
- Extra Batteries (Lots of Them!)
- Why: Cold temperatures drastically reduce battery life. You don't want to miss the show because your power died.
- My Recommendation: At least 2-3 spares. Keep them warm in an inside pocket until needed. I often use hand warmers wrapped around my spare batteries.
- Headlamp with Red Light Mode
- Why: You'll need light to adjust settings, but white light will destroy your night vision and disturb others.
- My Recommendation: Any headlamp with a red light option. Use it sparingly.
- Warm Clothing & Footwear
- Why: You'll be standing still for long periods in sub-zero temperatures.
- My Recommendation: Layers, layers, layers! Thermal base layers, fleece mid-layers, and a waterproof/windproof outer shell. Insulated boots, thick wool socks, a warm hat that covers your ears, and very warm gloves (I use thin liner gloves under thick ski gloves, allowing me to operate the camera without completely freezing).
- Hand Warmers
- Why: Essential for keeping your hands functional and also great for wrapping around batteries to extend their life.
- Microfiber Cloths
- Why: Condensation can be an issue when moving between warm and cold environments.
Don't skimp on the gear, especially the tripod and warm clothing. These aren't just about good photos; they're about a comfortable and successful experience.
Section 3: Mastering the Settings: Your Aurora Cheat Sheet
This is where the magic happens – or doesn't, if you get it wrong. Aurora photography requires full manual control. Here are the settings I use as a starting point, which you'll adjust based on the Aurora's intensity.
- Camera Mode: Manual (M)
- Why: You need complete control over aperture, shutter speed, and ISO.
- Focus: Manual Focus to Infinity
- Why: Autofocus won't work in the dark.
- How: Set your lens to manual focus. If your lens has an infinity symbol (∞), turn the focus ring all the way to it, then back off just a tiny bit (sometimes the true infinity is slightly before the hard stop). The most reliable method is to use Live View, zoom in on a distant star (or the moon/distant light if available), and manually adjust until the star is a pinpoint. Once set, do not touch the focus ring again. Tape it if you need to.
- Aperture: Wide Open (Lowest f-number)
- Why: To let in as much light as possible.
- Setting: f/2.8 is ideal. If your lens only goes to f/4, that can still work, but you might need to compensate with higher ISO or longer shutter speed.
- ISO: Start High, Adjust Down
- Why: To make the sensor very sensitive to light.
- Starting Point: Begin with ISO 1600 or 3200. If the Aurora is faint, go up to ISO 6400 or even 12800 (though noise will become noticeable). If the Aurora is very bright and fast-moving, you might be able to drop to ISO 800 or 1600.
- Goal: Find the lowest ISO that gives you a bright enough image without excessive noise.
- Shutter Speed: Depends on Aurora Activity
- Why: This determines how long your sensor collects light.
- Faint/Slow Aurora: 15-30 seconds. This allows enough light to be gathered for a visible image.
- Bright/Fast Aurora: 5-10 seconds. If the Aurora is dancing rapidly, a longer exposure will blur its intricate patterns. You want to "freeze" its movement.
- Experiment: Take a test shot. If it's too dark, increase shutter speed or ISO. If it's too bright, decrease shutter speed or ISO. If stars are trailing, your shutter speed is too long (aim for the "500 Rule" for stars, but Aurora is different – focus on the Aurora's movement).
- White Balance: Kelvin or Auto (with RAW)
- Why: To accurately represent the Aurora's colors.
- Setting: Start with Kelvin around 3200K-4000K. This often gives a pleasing cool tone. You can also use "Tungsten" or "Fluorescent" presets. If you shoot in RAW (which you absolutely should!), you can adjust this perfectly in post-processing.
- RAW vs. JPEG: Always shoot in RAW! It captures much more image data, giving you far greater flexibility in editing exposure, white balance, and noise without degrading quality.
- Image Stabilization (IS/VR): OFF
- Why: When on a tripod, image stabilization can actually introduce blur.
My Personal Workflow for Aurora Settings:
- Mount camera on tripod, attach remote.
- Set camera to Manual (M) mode.
- Set lens to Manual Focus, focus to infinity using Live View and a distant star.
- Set aperture to f/2.8 (or widest available).
- Set ISO to 3200.
- Set shutter speed to 15-20 seconds.
- Set White Balance to 3500K (or Tungsten).
- Take a test shot. Review the image (zoom in!).
- Too dark? Increase ISO or shutter speed.
- Too bright? Decrease ISO or shutter speed.
- Aurora blurring? Decrease shutter speed.
- Colors off? Adjust Kelvin.
- Adjust and repeat until you're happy!
Patience and experimentation are key. The Aurora is dynamic, so be prepared to adjust your settings as its intensity and movement change.
Section 4: Location, Location, Location: My Top Picks for October 2025
Where you go is almost as important as how you shoot. You need dark skies, clear horizons, and a high likelihood of Aurora activity. Here are my favorite destinations for an October 2025 Aurora hunt:
- Iceland: The Land of Fire and Ice offers incredible backdrops for Aurora photography.
- Why October: Less crowded than peak winter, but still plenty of darkness and stunning landscapes.
- Best Spots:
- Jökulsárlón Glacier Lagoon: Imagine the Aurora dancing over icebergs. It's breathtaking.
- Snaefellsnes Peninsula: Kirkjufell mountain (the "arrowhead mountain") is an iconic foreground.
- Golden Circle: While busy, areas slightly off the main route can offer dark skies.
- Remote Highlands: If you have a 4x4, venturing into the interior guarantees minimal light pollution.
- Logistics: Renting a car is highly recommended for flexibility. Roads are generally good in October, but be prepared for potential early snow. Prices for accommodation can vary, but expect to pay €100-€250 per night for mid-range hotels/guesthouses.
- Anecdote: My first truly spectacular Aurora display was near Vik in Iceland. I found a hidden black sand beach, set up my camera, and watched the sky erupt. The sound of the waves, the cold spray, and the dancing green lights made it feel like I'd stepped onto another planet.
- Norway: From rugged fjords to picturesque fishing villages, Norway provides dramatic scenery.
- Why October: Similar to Iceland, shoulder season means fewer people, but the coastal areas are still vibrant.
- Best Spots:
- Tromsø: Known as the "Gateway to the Arctic," it's a bustling city with excellent Aurora tours. You can stay in comfort and join nightly chases.
- Lofoten Islands: Stunning, jagged mountains rising from the sea. Reine, Hamnøy, and Nusfjord are postcard-perfect. Anecdote: I once captured the Aurora reflecting perfectly in the still waters of a Lofoten fjord, framed by those iconic red rorbu cabins. It's an image I still cherish.
- North Cape (Nordkapp): The very top of continental Europe, offering an unobstructed view north.
- Logistics: Public transport is good in Tromsø, but a car is ideal for Lofoten. Expect similar price ranges to Iceland for accommodation.
- Finland: Lapland is a winter wonderland, and October is when it starts to transform.
- Why October: Snow begins to fall, creating beautiful white landscapes that reflect the Aurora.
- Best Spots:
- Rovaniemi: Home of Santa Claus, but also a great base for Aurora hunting. Tours are abundant.
- Levi & Saariselkä: Ski resorts that offer excellent dark sky opportunities just outside the main towns.
- Kakslauttanen Arctic Resort (Glass Igloos): While pricey, imagine photographing the Aurora from the warmth of your bed! (You'll still need to go outside for proper tripod shots though).
- Logistics: Domestic flights are common. Car rental or tour buses are options. Accommodation here can range from cozy cabins (€80-€150) to luxury resorts.
- Sweden: Abisko National Park is renowned for its "Blue Hole."
- Why October: Abisko is consistently one of the driest places in Sweden, meaning fewer clouds.
- Best Spot:
- Abisko National Park: The "Blue Hole" is a patch of sky over Lake Torneträsk that often remains clear even when surrounding areas are cloudy. The Aurora Sky Station offers a unique viewing experience.
- Logistics: Accessible by train from Kiruna or even Stockholm. Accommodation is primarily at the STF Abisko Turiststation.
- Canada: For the truly adventurous, Canada offers vast, pristine wilderness.
- Why October: Long nights, but can be significantly colder than Scandinavia.
- Best Spots:
- Yellowknife, Northwest Territories: Often called the "Aurora Capital of North America," it boasts high visibility rates due to its flat landscape and location under the Aurora oval.
- Yukon (Whitehorse, Dawson City): Remote and stunning.
- Churchill, Manitoba: Famous for polar bears, but also excellent for Aurora.
- Logistics: These are often colder, more remote destinations requiring careful planning and specialized tours.
No matter where you go, always check local light pollution maps and try to get as far away from city lights as possible. A clear, unobstructed view to the north is paramount.
Section 5: Chasing the Lights: Planning Your October Adventure
Seeing the Aurora isn't just about being in the right place; it's about being there at the right time and with the right information.
- Aurora Forecasts: Your Best Friend
- KP Index: This is the key metric. It's a scale from 0 to 9, indicating geomagnetic activity. A KP of 3-4 is usually enough for visible Aurora in higher latitudes. KP 5+ means a strong display, potentially visible further south.
- Reliable Sources:
- NOAA Space Weather Prediction Center: For long-range forecasts (Kp index).
- My Aurora Forecast (app): Excellent for real-time data, probability, and cloud cover.
- Local Tour Operators/Websites: Often have the most accurate short-term forecasts for their specific region.
- Pro Tip: Start checking forecasts a few days before and continue hourly on your chosen night.
- Weather: The Cloud Cover Conundrum
- The Enemy: Clouds. You can have a KP 9 forecast, but if the sky is overcast, you'll see nothing.
- How to Check: Use local weather apps (like Yr.no for Scandinavia) that show cloud cover. Look for gaps in the clouds, or areas with clear skies. Sometimes driving just 30-60 minutes can take you out of a cloudy patch.
- Timing is Everything
- Prime Hours: The Aurora is most active between 10 PM and 2 AM, but can appear anytime from sunset to sunrise.
- Patience: It's not always a sudden explosion. Often, it starts as a faint glow and slowly builds. Be prepared to wait, sometimes for hours. Bring a thermos of hot chocolate!
- Safety First in the Cold
- Dress Warm: Reiterating this because it's that important. Hypothermia is a real risk.
- Stay Hydrated & Fed: Bring snacks and warm drinks.
- Inform Others: If you're venturing out alone, let someone know your plans.
- Driving: October can bring icy or snowy roads. Drive cautiously, ensure your rental car has appropriate tires, and know how to use them.
- Tours vs. Self-Drive
- Tours: Pros: Expert guides who know the best spots and forecasts, often include warm drinks/snacks, safe transport. Cons: Less flexibility, can be expensive, sometimes crowded.
- Self-Drive: Pros: Ultimate flexibility, freedom to chase clear skies, can stay out as long as you want. Cons: Requires navigation skills in the dark, awareness of local driving conditions, potential for getting stuck or lost.
- My Advice: If it's your first time, consider a tour for the first night or two to get your bearings, then self-drive if you feel confident.
Section 6: Post-Capture Magic: Editing Your Aurora Photos
Your raw files will likely look a bit flat straight out of the camera. A little post-processing can truly make your Aurora shots pop.
- Software: Adobe Lightroom Classic or Photoshop are industry standards. GIMP or Darktable are free alternatives.
- Basic Adjustments:
- Exposure: Adjust to bring out the details without blowing out highlights.
- Contrast: Increase slightly to add depth.
- Highlights/Shadows: Recover detail in bright areas (like stars) and lift shadows.
- Blacks/Whites: Set your black and white points for maximum dynamic range.
- White Balance Correction:
- If you shot in RAW, you can fine-tune the Kelvin temperature until the greens and purples look natural and vibrant. Avoid making the sky look unnaturally blue or yellow.
- Noise Reduction:
- High ISO settings will introduce noise. Apply luminance noise reduction carefully to smooth out grain without losing too much detail. Start with small adjustments.
- Sharpening:
- Apply a touch of sharpening, especially to foreground elements or stars.
- Compositional Tweaks:
- Cropping: Improve your composition.
- Straighten: Ensure your horizon is level.
- Color Saturation/Vibrance:
- Carefully boost the vibrance or saturation of greens and purples, but don't overdo it. The goal is to enhance, not create artificial colors.
My Editing Philosophy: Aim for a natural, breathtaking look. The Aurora is already incredible; your edits should enhance its beauty, not invent it.
Section 7: Beyond the Camera: Experiencing the Moment
As a photographer, it's easy to get lost behind the lens, constantly tweaking settings and reviewing shots. And while getting that perfect shot is immensely satisfying, remember to step away from your camera.
Look up. Take a deep breath of the crisp, cold air. Let your eyes adjust and simply watch the celestial dance unfold. The Aurora is an experience that transcends pixels and megapixels. It's a reminder of the vastness and wonder of our universe, a moment of profound connection to something ancient and powerful.
Share that moment with your travel companions. Share it with the world through your incredible photographs. But first, just live it.
Conclusion: Your Aurora Adventure Awaits
Photographing the Northern Lights is more than just a technical challenge; it's an adventure, a pilgrimage to witness one of Earth's most spectacular natural phenomena. October 2025 offers a unique window of opportunity with increased solar activity and manageable weather, making it the perfect time to embark on this journey.
With the right gear, the proper settings, a bit of planning, and a whole lot of patience, you'll be well-equipped to capture stunning images that will leave friends and followers speechless. These aren't just photos; they're memories frozen in time, stories whispered by the universe itself.
So, start planning your October 2025 Aurora chase now! Research your destination, pack your warmest clothes, and prepare to be amazed. When you capture your first breathtaking shot, make sure to tag @Tripsora and use #TripsoraAurora. We can't wait to see the magic you create!
---
More pictures



Tags
Share this guide
We may earn a commission if you click a link and buy a product or service, at no extra cost to you. How affiliate links work.
Been there?