
My journey into underwater photography began with frustration, but finding the right beginner gear unlocked a world of vibrant marine life and transformed my travels. This post shares my personal story and the exact equipment that made capturing the ocean's magic accessible and life-changing. ---
My Underwater Awakening: How Beginner Gear Changed My Life Forever
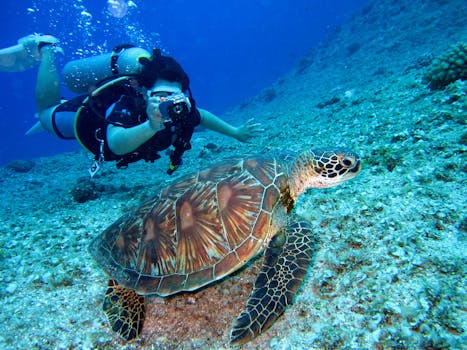
There are moments in life that redefine you. For me, one such moment happened not on a mountain peak or in a bustling city square, but about 15 meters below the surface, off the coast of a tiny island in Indonesia. I was hovering weightlessly, a kaleidoscope of reef fish dancing around me, a majestic sea turtle gliding past, its ancient eyes seemingly acknowledging my presence. And for the first time, I wasn't just seeing it; I was capturing it. Not with a blurry phone snap in a dodgy waterproof pouch, but with a clarity and vibrancy that made my heart sing.
This wasn't always my reality. For years, I'd returned from incredible dive and snorkel trips with nothing but vivid memories and a handful of disappointing, murky photos. My land-based photography skills were solid, but the underwater world felt like an entirely different beast – expensive, complicated, and utterly out of reach for a beginner like me. I’d scour forums, intimidated by talk of strobes, sync cables, and five-figure camera setups. "This isn't for me," I'd sigh, resigning myself to postcard purchases.
But then, something shifted. A particularly stunning dive in Komodo National Park, teeming with manta rays, left me so desperate to share the experience that I decided enough was enough. I wasn't aiming for National Geographic covers; I just wanted to share the magic. I wanted to show my friends the iridescent scales of a parrotfish, the intricate patterns on a nudibranch, the sheer joy of swimming alongside a reef shark. And guess what? It didn't take an entire second mortgage. It took a few well-chosen pieces of beginner-friendly gear, a dash of courage, and a whole lot of patience.
That decision wasn't just about buying a camera; it was about opening a portal to a new passion, a deeper connection with the ocean, and a way of storytelling that has genuinely changed my life and how I experience travel. If you've ever felt that pull, that desire to freeze those fleeting moments beneath the waves, then this post is for you. Forget the intimidation; let me show you the gear that made it all possible for me, a total beginner.
The Leap of Faith: My First Foray into Underwater Photography (and the Gear That Made it Possible)
My journey began with a simple philosophy: start small, learn the ropes, and upgrade later. I knew I wasn't ready for a full DSLR rig, nor did my budget allow for it. What I needed was reliable, relatively affordable, and most importantly, easy to use.
1. The Action Camera: My Gateway Drug to the Deep (GoPro Hero 9 Black)
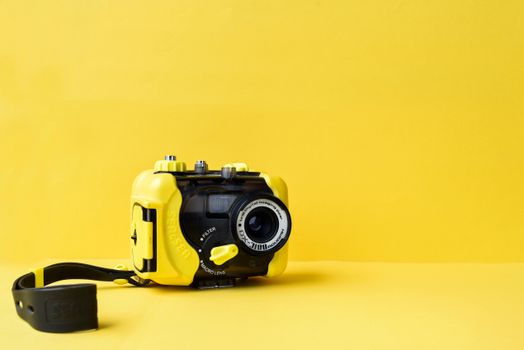
My absolute first proper underwater setup was a GoPro Hero 9 Black (now you might look at a Hero 11 or 12). I know, I know, "everyone has a GoPro." But hear me out: for a beginner, it's an absolute game-changer. It's compact, relatively inexpensive (compared to other options), and incredibly versatile.
Why it worked for me:
- Ruggedness: It’s built to take a beating, which is perfect when you’re still fumbling with buoyancy.
- Simplicity: Point and shoot. The menu system is intuitive, and I could quickly switch between video and photo modes.
- Video Quality: GoPros excel at video, which is often what you want to capture when you first start. My first clear video of a school of barracuda swirling around me in Sipadan still gives me goosebumps.
- Availability of Accessories: This is key. From basic waterproof housings to filters and mounts, the GoPro ecosystem is vast.
My specific setup:
- GoPro Hero 9 Black: (Approx. $300-400, depending on sales/model)
- Official GoPro Protective Housing: This is NON-NEGOTIABLE if you plan to go deeper than 10 meters (33 feet). The camera itself is waterproof, but the housing provides extra protection and depth rating (typically to 60m/196ft). I learned this the hard way after a friend's GoPro flooded without one. (Approx. $50)
- Red Filter: Crucial for bringing back color in tropical waters. Without it, everything looks green or blue. I bought a basic snap-on filter for about $20. For shallower snorkeling (0-5m), you might not need it, but beyond that, it's a lifesaver for vibrant photos.
- Floaty Handle/Grip: Not just for stability, but for peace of mind. Dropping your camera in the ocean is a nightmare. This simple accessory (approx. $15-25) ensured my GoPro would float if it slipped from my hand.
My Experience & Tips: My GoPro became my constant companion on a dive trip to Raja Ampat. I mostly shot video, grabbing stills from the footage later. The wide-angle lens captured the vastness of the reefs, and with the red filter, the colors were surprisingly good. It taught me the basics of composition, how to approach marine life without scaring it, and the importance of good buoyancy. It wasn't perfect – low light was still a challenge, and the lack of zoom meant getting really close was essential – but it ignited the spark.
2. The Compact Camera Upgrade: Stepping Up My Game (Olympus Tough TG-6)
After a year with my GoPro, I craved more control and better image quality, especially in trickier lighting conditions. I still wasn't ready for the leap to a mirrorless system, but I wanted something that felt more like a "camera" than an action cam. Enter the Olympus Tough TG-6.
This camera is legendary in the beginner and even intermediate underwater photography communities, and for good reason. It's built like a tank, waterproof to 15m (50ft) without an external housing, shockproof, crushproof, and freezeproof.
Why it became my go-to:
- Image Quality: A significant step up from the GoPro. The larger sensor and better optics produced noticeably sharper images with more detail and dynamic range.
- Macro Mode: This was the game-changer for me. The TG-6 has an incredible microscope mode that lets you get incredibly close to tiny critters – nudibranchs, gobies, shrimp. My first clear macro shot of a tiny pygmy seahorse on a gorgonian fan in the Philippines felt like a monumental achievement.
- Manual Controls (to an extent): While not full manual, it offers aperture priority, shutter priority, and custom white balance, which are crucial for fine-tuning underwater shots.
- RAW Capture: This allows for much more flexibility in post-processing, pulling out details and correcting colors that would be lost in JPEGs.
- Expandability: This is where the TG-6 truly shines for progression.
My specific setup:
- Olympus Tough TG-6: (Approx. $450-500)
- PT-059 Underwater Housing: Even though the camera is waterproof, for diving deeper than 15m or for extra protection, a dedicated housing is essential. Olympus makes a fantastic, robust housing for its TG series. (Approx. $300-400)
- Underwater Strobe (Sea & Sea YS-03 SOLIS): This was my biggest investment and the one that truly revolutionized my photos. Natural light dissipates quickly underwater, making everything look dull and monochromatic. A strobe brings back vibrant colors and adds dimension. The YS-03 is a great entry-level strobe that's easy to use. (Approx. $350-400)
- Tray & Handles: A stable platform for your camera and strobe(s). It reduces camera shake and makes handling much more comfortable. (Approx. $50-100)
- Fiber Optic Cable: Connects the camera's internal flash to trigger the external strobe. (Approx. $40-60)
- Wet Lens (Optional, but recommended): I later added a wide-angle wet lens for capturing larger scenes and a macro wet lens for even closer close-ups. These screw onto the housing port. (Approx. $100-300 each)
My Experience & Tips: The TG-6 with its housing and strobe became my primary setup for a dive expedition in the Galapagos. The difference was night and day. The strobe brought out the incredible reds and oranges of the endemic marine iguanas feeding underwater, and the vibrant blues of the Galapagos sharks. The macro mode allowed me to capture the intricate details of the seahorses and nudibranchs that often go unnoticed. This setup gave me the confidence to experiment, learn about ambient light vs. artificial light, and truly explore the art of underwater photography.
Beyond the Camera: Essential Accessories That Make All the Difference
While the camera is the star, these supporting actors are crucial for a successful (and safe!) shoot.
- Underwater Housing (The Unsung Hero): I've mentioned it for both cameras, but it deserves its own spotlight. Never skimp on a housing. Always buy from a reputable brand (GoPro, Olympus, Ikelite, Nauticam, Fantasea).
- Maintenance is Key: After every use, rinse thoroughly with fresh water. Check the O-rings for any hair, sand, or debris. A tiny speck can cause a catastrophic flood. Lubricate O-rings regularly with silicone grease. This meticulous care became a ritual for me, ensuring my gear's longevity.
- Underwater Lights/Strobes (Bringing Back the Color): Even a simple video light (around $100-200) can dramatically improve your photos and videos by restoring lost colors and adding contrast. Strobes (like my Sea & Sea) are more powerful, freeze motion, and offer better light quality for stills.
- Placement Matters: Experiment with where you position your light source. Backlighting can create stunning silhouettes, while side lighting adds depth. Avoid direct frontal lighting, which can cause backscatter (those annoying white dots from particles in the water).
- Tray and Handles (Stability and Comfort): Holding a camera and an external light source can be awkward. A tray with handles provides a stable platform, reduces camera shake, and makes it much easier to compose your shots and manage your gear, especially when wearing thick gloves.
- Red/Magenta Filters (The Quick Color Fix): For GoPros and compacts without external lighting, these are essential for correcting color loss at depth. Red filters for blue water, magenta for green water. They don't replace strobes but are a great start.
- Float Strap or Lanyard (Don't Lose Your Precious!): Whether it's a bright yellow floaty for your GoPro or a sturdy lanyard for your compact, securing your camera to your wrist or BCD is non-negotiable. The ocean is vast, and losing your gear is heartbreaking.
My Top 5 Beginner Underwater Photography Tips (Learned the Hard Way)
Gear is only half the battle. Here are the most impactful lessons I learned that took my photos from "meh" to "wow!"
- Master Your Buoyancy: This is the most crucial tip. If you're constantly fighting to stay neutral, kicking up sand, or bumping into the reef, you won't get good photos. Practice hovering, finning gently, and maintaining perfect trim. Good buoyancy protects the reef and allows you to focus on your shot. I spent countless dives just practicing hovering in one spot, pretending to take photos.
- Get Close, Then Get Closer: Water absorbs light and clarity. The more water between your camera and your subject, the more color and sharpness you lose. Don't be afraid to get within inches of your subject (respectfully, of course). This is especially true for macro photography.
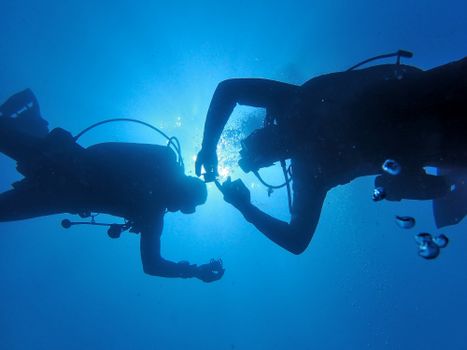
- Shoot Upwards (When Possible): Instead of shooting down on subjects, try to get below them and shoot upwards towards the surface. This uses the natural light of the sun as a backlight, creates dramatic silhouettes, and makes your subject pop against the bright background. It also helps avoid distracting backgrounds.
- Understand Light (Even Basic Principles): Natural light is your friend in shallow water. In deeper water, artificial light (strobe/video light) is essential. Pay attention to the direction of the light. Avoid shooting directly into the sun unless you're going for a specific silhouette effect. Learn about "backscatter" (those annoying white dots from particles reflecting your flash) and how to minimize it by angling your strobe outwards.
- Patience and Respect for Marine Life: The best shots come from observing and waiting for marine life to behave naturally. Never chase, touch, or harass animals for a photo. Be patient, move slowly, and let them get comfortable with your presence. The health of the reef and its inhabitants always comes before a photo opportunity. I once spent 20 minutes patiently waiting for a shy octopus to emerge from its crevice in Thailand, and the resulting shot was pure gold.
Budgeting for Your Underwater Dream: What to Expect
Let's talk money, because that's often the biggest hurdle. Remember, these are approximate prices and can vary greatly with sales, used gear, and specific models.
- Entry-Level (GoPro Setup):
- GoPro Hero (latest model): $300-400
- Official Housing: $50
- Red Filter: $20
- Floaty Handle: $20
- Total: ~$390 - $490
- This is an amazing starting point for snorkelers and shallow divers.
- Mid-Level (Compact Camera Setup - My TG-6 Path):
- Olympus TG-6: $450-500
- Olympus PT-059 Housing: $300-400
- Entry-level Strobe (e.g., Sea & Sea YS-03): $350-400
- Tray & Handles: $50-100
- Fiber Optic Cable: $40-60
- Total: ~$1190 - $1460
- This is where you get serious about quality and control, suitable for dedicated divers.
- Where to Save, Where to Splurge:
- Save: On initial filters (buy basic ones), extra batteries (third-party are often fine), and maybe even a used GoPro (ensure it's in good condition and get a new housing).
- Splurge: On the housing (it protects your entire investment!), and eventually, good lighting (strobe/video light) – it makes the biggest difference to image quality.
Remember, this is an investment in a hobby that brings immense joy and a deeper appreciation for our planet's oceans.
My Life, Transformed: The Unseen Impact
Learning underwater photography wasn't just about taking better pictures; it was about seeing the world differently. It forced me to slow down, to observe, to be present in the moment. My travels became richer, my dives more purposeful. I started noticing the tiny ecosystems within a single coral head, the intricate camouflage of a stonefish, the subtle communication between reef inhabitants.
It also connected me to a global community of passionate ocean lovers. Sharing my photos on Tripsora and Instagram led to conversations, tips, and even new dive buddies. It gave me a platform to advocate for marine conservation, to show others the beauty that needs protecting. My photos became more than just souvenirs; they became stories, calls to action, and windows into a world many never get to see.
From that first blurry GoPro shot to the vibrant macro images I capture today with my TG-6, my journey into underwater photography has been nothing short of life-changing. It’s an adventure that continues to unfold with every dive, every click of the shutter, and every breathtaking encounter beneath the waves.
So, if you've ever dreamed of capturing the ocean's magic, don't let intimidation hold you back. Start with the basics, learn as you go, and prepare to have your world transformed. The underwater world is waiting for you, and trust me, it's even more incredible through a lens.
Are you ready to dive in? What's holding you back, or what's your first piece of underwater gear going to be? Share your thoughts in the comments below!
---
More pictures


Tags
Share this guide
We may earn a commission if you click a link and buy a product or service, at no extra cost to you. How affiliate links work.
Been there?