
Ever wondered how locals capture those breathtaking underwater shots without breaking the bank? We're spilling the beans on the secret gear and techniques they use to get stunning photos, far from the tourist traps. Get ready to transform your underwater memories into shareable masterpieces! ---
Unmasking the Magic: The Underwater Photography Secrets Locals Don't Want Tourists to Know
The turquoise waters of Southeast Asia. The vibrant reefs of the Caribbean. The majestic marine life of the Great Barrier Reef. We’ve all seen those impossibly clear, vibrantly colored underwater photos that pop up on our feeds, making us instantly crave a dip. But let's be honest, for most of us, our own attempts often end up as murky, green-tinged blobs, a far cry from the dazzling reality we experienced.
I remember my first dive trip to Palawan, Philippines. I’d splurged on a bulky, expensive rental camera rig – a DSLR in a massive housing, complete with strobes. It was heavy, cumbersome, and frankly, terrifying to maneuver underwater. My photos were... okay. Passable. But then I saw him: a local dive guide, gliding effortlessly through a coral garden, a small, unassuming camera in hand. His shots, shared later over a bintang, were absolutely stunning. Crisp, colorful, alive. They captured the true essence of the underwater world in a way my behemoth rig simply couldn't, or rather, I couldn't with it.
That moment was my epiphany. It wasn't about the biggest, most expensive gear. It was about smart choices, understanding the environment, and a few insider tricks that locals have perfected over generations of living by the sea. They’ve learned to capture the magic without drawing attention, without breaking the bank, and with gear that lets them move as freely as the fish themselves. And today, I'm going to spill those secrets. This isn't just about cameras; it's about unlocking a whole new world of underwater storytelling that most tourists never even realize exists.
Ready to dive in? Let's talk gear that gives you the edge.
The Myth of the Mega-Rig: Why Locals Go Lean & Smart
Forget the image of a professional underwater photographer burdened with a massive, multi-thousand-dollar rig. While those setups have their place in high-end commercial shoots, for the vast majority of us – especially beginners and travel enthusiasts – they're overkill, expensive, and frankly, a barrier to entry. Locals, who often rely on their gear daily for guiding, fishing, or simply documenting their marine backyard, prioritize a few key things:
- Portability: Easy to carry, pack, and maneuver in strong currents or tight spaces.
- Durability: Built to withstand salt, sand, drops, and the general rigors of daily use.
- Ease of Use: Simple controls, quick adjustments, minimal fuss.
- Cost-Effectiveness: Great results without requiring a second mortgage.
Their philosophy is simple: the best camera is the one you actually use and feel comfortable with. They understand that incredible photos come from understanding light, composition, and marine life behavior, not just the brand name on your housing. They'd rather spend their hard-earned money on more dives or better fins than on gear they'll struggle with. This lean approach is the first secret to stunning underwater photos – and it’s one that will save your wallet and your sanity.
The Action Cam Advantage: Your Underwater Workhorse (GoPro & Friends)
If there's one piece of gear that has revolutionized accessible underwater photography, it's the action camera. And trust me, every local guide worth their salt has one. Brands like GoPro, DJI Osmo Action, and Insta360 have become indispensable for their incredible versatility, compact size, and robust waterproofing.
Why they're a local favorite:
- Compact & Lightweight: Fits in your palm, slips into any bag. No bulky housing needed for shallow depths (usually up to 10m/33ft, but check specific models).
- Deep Diving Ready: With a simple, affordable dive housing (typically $50-100), most action cams can go down to 60m (200ft) – far deeper than any recreational diver will ever go.
- Wide-Angle Lens: Perfect for capturing expansive reefscapes and getting close to marine life without needing to back up.
- Video & Photo Powerhouse: Seamlessly switch between stunning 4K video and high-resolution stills.
- Affordable Entry: A brand new GoPro Hero 11 or DJI Osmo Action 4 can be found for around $300-$400, often less during sales. Older models like the Hero 9 or 10 are even cheaper and still fantastic.
My Personal Pick & Settings: I swear by my GoPro Hero 11 Black for most of my quick underwater shots and videos. It’s a workhorse. For stills, I shoot in RAW (if available) or SuperPhoto/HDR mode. Crucially, I always set my White Balance manually to 4500K-5500K depending on depth, or use the "Underwater" preset if I'm not feeling fiddly. I keep my ISO low (100-400) to minimize noise and often use Protune to get a flatter color profile, which gives me more flexibility in post-processing. For video, 4K at 30fps or 60fps is usually my go-to.
Actionable Tip: Don't just point and shoot. Experiment with different settings. Watch YouTube tutorials specifically for underwater GoPro settings. The difference between default settings and optimized ones is night and day.
Beyond the Camera: Essential (and Secretly Smart) Accessories
Having a great action cam is just the start. The real magic, and where locals truly shine, comes from a few key accessories that transform murky blues into vibrant underwater canvases. These are the unsung heroes that tourists often overlook.
- Red Filters / Color Correction Filters: This is THE most important accessory for any underwater camera, especially action cams. Water absorbs red and orange light very quickly, which is why everything looks blue-green underwater. A red filter (for tropical blue water) or a magenta filter (for green water) puts that color back.
- How to use: Snap it onto your action cam housing or point-and-shoot. Some filters are designed for specific depths (e.g., shallow, mid-range, deep).
- Cost: Usually $20-$50. Brands like PolarPro, Telesin, and even GoPro make excellent ones.
- Anecdote: My first time using a red filter in Bali’s Nusa Penida, I literally gasped underwater. The dull blue suddenly exploded with purples, reds, and oranges from the corals and fish. It felt like I’d just cleaned my glasses!
- Tray & Lights (Small & Mighty): While massive strobes are out, a small, affordable dive light or even a compact video light can make a huge difference, especially for macro shots or in deeper, darker areas.
- Why locals use them: To "paint" light onto subjects, bringing out details and colors that ambient light misses. They also use them as focus lights.
- What to look for: A compact, powerful dive torch (1000-2500 lumens) that can attach to a simple tray. Brands like SeaLife, OrcaTorch, and even some generic Amazon brands offer great value. A basic tray with one or two small lights might cost you $100-$300.
- My Setup: I have a small single-handle tray with an inexpensive 1500-lumen video light. It’s not professional studio lighting, but it adds that crucial pop to close-up shots of nudibranchs or shy reef fish.
- Floaty Handle / Dome Port:
- Floaty Handle: Essential for keeping your camera from sinking to the abyss if you lose your grip. Also provides a stable grip. Costs $10-$20.
- Dome Port: This is where things get really cool. A dome port for your action cam allows you to take those stunning "split shots" or "half-and-half" photos – half above water, half below. It optically corrects distortion caused by the flat port of the standard housing.
- Cost: $50-$100. Look for brands like Telesin or GoPro's own dome.
- Instagram-worthy: These shots are pure social media gold and instantly elevate your travel photos.
- Anti-Fog Inserts: A simple, cheap, yet absolutely critical accessory. These small silica gel packets prevent condensation inside your housing, which can ruin your shots. A pack of 12 costs under $10 and can save an entire trip's worth of photos. Always use them!
Compact Powerhouses: The Point-and-Shoot Wonders (Olympus Tough Series)
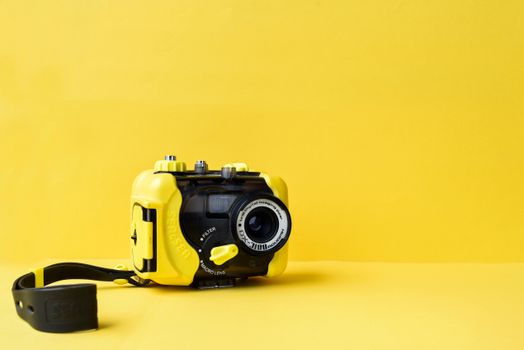
While action cams are kings of versatility, if you're looking for something with a bit more photographic oomph without the DSLR bulk, the Olympus Tough TG series (TG-6, TG-7) is the undisputed champion for beginners and even many seasoned pros. Locals often use these for their incredible macro capabilities and robust design.
Why they're a game-changer:
- Truly Waterproof: Out of the box, these cameras are waterproof to 15m (50ft) without any housing! Perfect for snorkeling and shallow dives. For deeper dives (up to 45m/147ft), Olympus offers a dedicated housing for around $300.
- Excellent Lens & Sensor: A bright f/2.0 lens and a surprisingly good sensor deliver superior image quality compared to most action cams, especially in lower light.
- Unrivaled Macro Capabilities: This is where the TG series truly shines. Its "Microscope Mode" allows for incredibly close-up shots of tiny marine life like nudibranchs, gobies, and corals, revealing details you'd never see with the naked eye.
- Built-in Underwater Modes: Olympus has dedicated modes for underwater Wide, Macro, and even HDR, optimizing settings for you.
- RAW Shooting: Gives you maximum flexibility for post-processing.
- Cost: The Olympus TG-7 retails for around $500-$600. An older TG-6 can be found for less.
My Experience & Tips: I often carry both my GoPro and my Olympus TG-6. The GoPro is for wide-angle video and quick action. The TG-6 is for when I want to slow down and capture intricate details. The Microscope Mode is addictive! When using it, make sure you're very stable and get as close as possible without disturbing the subject. I also find the TG series pairs beautifully with a small ring light or a compact external flash (like the Olympus UFL-3) if you want to get serious about macro, though even without, the results are fantastic.
Mastering the Basics: Techniques Locals Swear By
Even with the best gear, your photos won't sing if your technique is lacking. Locals understand that great underwater photography is as much about patience and respect as it is about camera settings.
- Get Closer, Closer, Closer! This is the golden rule of underwater photography. Water absorbs light and clarity, so the more water between you and your subject, the duller and blurrier your photo will be. Minimize that distance. Get within inches if possible (without touching or disturbing marine life!).
- Understand the Light:
- Shoot Upwards: Whenever possible, try to shoot slightly upwards towards the sun. This backlights your subject beautifully and brings out vibrant blues in the background.
- Midday Sun: The hours between 10 AM and 2 PM offer the best light for underwater photography as the sun is directly overhead, penetrating the water most effectively.
- Buoyancy Control is Key: Not just for safety, but for stable shots. Flailing around disturbs marine life, stirs up sediment, and makes it impossible to hold your camera steady. Invest time in perfecting your buoyancy.
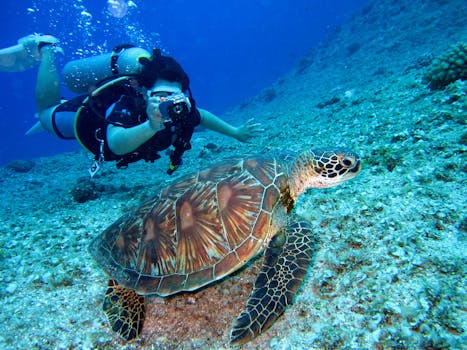
- Patience & Respect: Marine life isn't on your schedule. Wait for that turtle to turn, that fish to emerge from the coral, or that nudibranch to unfurl. Never chase, touch, or harass animals. A good photo is never worth stressing or harming an animal. Locals embody this respect.
- Post-Processing Power (Lightroom Mobile/Snapseed): Even with a red filter, underwater photos often benefit from a little tweak. Free apps like Adobe Lightroom Mobile or Snapseed can dramatically improve your shots.
- Key Adjustments:
- White Balance/Temperature: Adjust to remove blue/green cast.
- Exposure & Highlights/Shadows: Brighten up dark areas, recover blown-out highlights.
- Contrast & Clarity: Add punch and definition.
- Saturation/Vibrance: Bring out those colors!
- Local Secret: Many guides use their phones to do quick edits right on the boat, sharing stunning results instantly. Learn their tricks!
Where to Practice Your New Skills (Local Secrets Revealed!)
Now that you're armed with the right gear and knowledge, where do you put it to practice? Locals aren't going to give away their exact secret spots (and neither will I, fully – some magic needs to be discovered!), but they will point you in the right direction.
- Seek Out Smaller, Less-Known Reefs: Instead of the main tourist dive sites teeming with boats, ask local dive operators (especially the smaller, family-run ones away from the main strip) about their "backyard" reefs. These are often healthier, less disturbed, and full of surprising macro life.
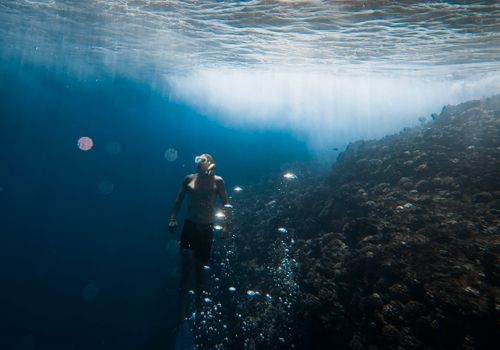
- Shallow Coral Gardens: Don't underestimate the beauty of shallow reefs (2-5 meters). They get abundant light, making color pop, and are perfect for snorkeling or freediving with an action cam. Think the eastern side of Gili Meno in Indonesia, or the calmer bays of El Nido's Cadlao Island in the Philippines, especially early mornings.
- Marine Protected Areas (MPAs): These zones are often meticulously cared for by local communities, leading to thriving ecosystems and abundant marine life. While sometimes requiring a small fee, the rewards are immense. Ask your local guide about nearby MPAs.
- Listen to the Guides: The best advice comes from those who spend their lives on and in the water. Strike up conversations with boat captains, snorkel guides, and dive masters. They often know exactly where that rare nudibranch hangs out or where the resident turtle likes to graze. My favorite tip: I once found an incredible pygmy seahorse spot off Anilao, Philippines, just by asking a local boatman where he liked to snorkel on his days off. It wasn't on any dive map!
- Night Dives/Snorkels: A whole new world awakens after dark. Many creatures are nocturnal, and with a good dive light, you can capture incredibly dramatic and unique shots. Just make sure you're comfortable and have a knowledgeable guide.
Dive In, Capture the Magic, and Share Your Story
The secret isn't in spending a fortune; it's in making smart choices, embracing simplicity, and learning a few tried-and-true techniques that locals have perfected. By opting for an action cam or a rugged point-and-shoot like the Olympus TG series, paired with essential accessories like a red filter and a small light, you'll be amazed at the quality of photos you can capture.
You're not just taking pictures; you're becoming a storyteller, sharing the hidden beauty of our oceans, and perhaps, inspiring others to protect them. So, pack smart, dive responsibly, and let your lens reveal the underwater wonders that most tourists only dream of.
Now it's your turn! Grab your gear, head to the water, and start capturing your own breathtaking moments. What's your favorite piece of budget-friendly underwater gear? Have you discovered any secret tips from locals? Share your experiences and photos with us below! Let's keep these underwater wonders thriving and visible for all to appreciate.
---
More pictures


Tags
Share this guide
We may earn a commission if you click a link and buy a product or service, at no extra cost to you. How affiliate links work.
Been there?